I never expected to keep a shoebox full of wine corks, but somehow they became a small pile of treasures on my workbench. Playing with corks has a comforting rhythm: the soft, honeyed scent, the tiny stamped letters, the satisfying weight of a handful that feels like a quiet craft supply treasure.
DIY Wine Cork Crafts have a homey charm that makes ordinary afternoons feel playful.
From little tabletop accents to tactile pieces that live on the wall, the topic brings out small moments of making and memory without needing a fancy studio.
Cozy cork coasters with a rustic vibe

I love the warm, quiet clack when a mug meets cork. The surface gives a soft, muffled sound and a faint woody aroma that brings back evenings with a book.
Tiny grain patterns and slight color differences from bottle stamps make each piece feel unique. When set on a wooden table the tan tones seem to glow in late light.
Holding one between my fingers reveals a springy resilience that feels familiar and comforting, an everyday object that seems to invite slow, small rituals.
Steps
- Gather a handful of corks and slice them lengthwise into flat rounds.
- Arrange the cork halves in a tight grid or circular pattern on a backing board.
- Apply adhesive between cork pieces and press them together until bond is secure.
- Trim any uneven edges and buff the surface for a neat finish.
An earthy trivet for hot pots and pans
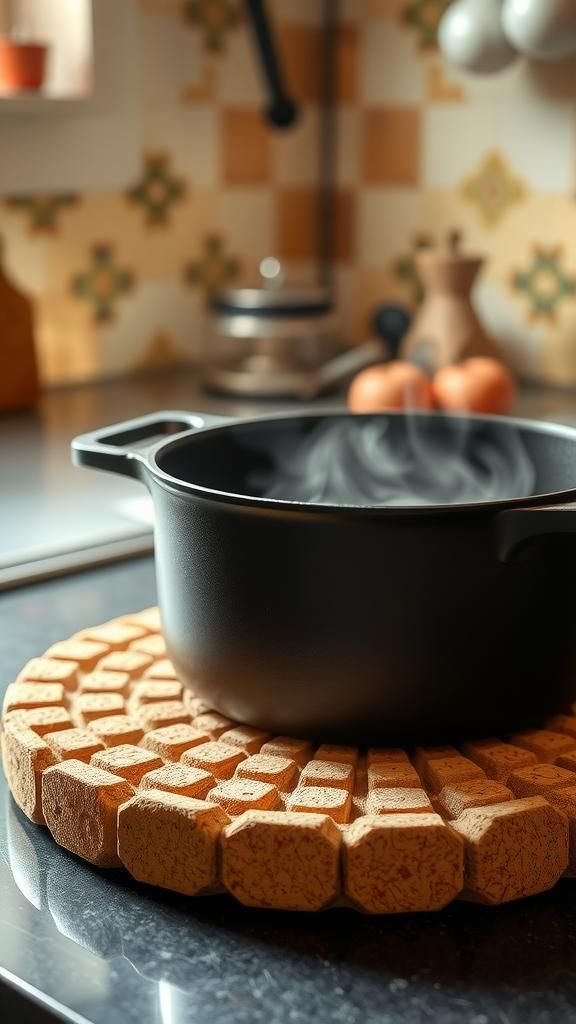
There is comfort in setting a steaming pot down on a cork surface. The texture feels pleasantly textured under the palm and absorbs heat with a mellow hush.
Flecks of cork show mottled browns and creams, and the overall shape carries a handmade charm that softens a busy stove area. When I stand at the counter with the warmth rising, the trivet’s porous surface gives a gentle, natural scent that blends with kitchen aromas.
It sits naturally among other well-loved kitchen items, patient and steady.
Steps
- Collect a generous number of corks and align them side by side to estimate layout size.
- Slice corks to consistent thickness and organize them into a compact pattern on a heat-resistant backing.
- Secure each cork to the backing with a strong heat-safe adhesive and press firmly.
- Finish edges by trimming excess backing and optionally sealing the underside for durability.
Simple cork keychains that carry tiny memories

Keychains made from cork have a lightness that feels good in a pocket. The tiny stamps and bottle marks are like little stories tucked into everyday life.
Holding one up, I notice the subtle textural contrast between the porous sides and smoother cut faces. The cool metal ring gives a friendly clink against the cork and the whole piece reminds me of evenings gathered around a table.
Tactile and modest, the charm slips into pockets without bulk and seems to age with a quiet friendliness.
Steps
- Select straight corks and bore a narrow hole through one end for hardware.
- Insert a small screw eye or metal eyelet into the pierced end for attachment.
- Thread a split key ring through the eyelet and add any decorative cord or bead.
- Buff any rough edges and polish the cork surface for a finished look.
A corkboard with warm, handmade texture

A patchwork of corks makes a pin board feel like a lived-in surface. The tiny seams between pieces create a soft topography of ridges and valleys that welcome pins with a gentle resistance.
The scent is subtly woody and calming when I stand close enough to hang a postcard. Colors range from pale cream to caramel, and the stamped logos look like miniature map marks.
It sits on the wall like a quiet memory keeper, holding notes and photographs with an unassuming, homespun charm.
Steps
- Arrange many corks side by side on a firm backing to cover the desired board size.
- Trim cork ends for evenness and press them into place, securing with an adhesive suitable for walls.
- Frame the assembled cork panel with a wooden frame for stability and aesthetics.
- Allow full drying time before hanging and adding pins or paper.
Napkin rings with a rustic, tactile charm

Small cork rings give a table setting an inviting, homey feel. The subtle chew of the material against fabric adds a quiet texture when hands settle around a napkin.
I enjoy the contrast between smooth linens and the cork’s tiny pits and striations; the neutral tones blend with wood and ceramic. When evenings stretch on, the napkin rings feel like little anchors on the table, each one carrying a faint trace of past gatherings.
They tuck neatly into drawers and pop up when company arrives.
Steps
- Slice corks into uniform discs and prepare circular bases to host them.
- Arrange discs around a ring-shaped form and adhere them closely for a continuous surface.
- Smooth edges and sand the outer circumference for comfort if needed.
- Optionally finish with a light sealant for spill resistance before setting on the table.
Mosaic picture frame with tiny cork tiles

A frame covered in cork tiles has a quiet, tactile energy that changes as light moves across it. The little ends of cork show concentric textures and tiny wine-stamp patterns that read like an abstract map.
When placed beside a family photograph it adds a casual, handmade border that feels intimately domestic. The surface invites a close look; fingertips can trace the slight ridges and the faint scent is always reassuring.
This frame sits on a shelf with well-worn books, blending into a relaxed corner of a room.
Steps
- Slice corks into thin tiles and sort them by color and texture for composition.
- Lay the tiles on a wooden or cardboard frame, testing the arrangement visually.
- Secure each tile in place with an adhesive and press firmly for even contact.
- Trim edges and clean any stray adhesive before inserting the photo and backing.
Tiny cork plant markers for potted herbs

Tucked among basil and thyme, little cork tags have a playful sincerity. They bob slightly when pots are moved and keep a mellow, organic presence in the soil.
The texture stays dry to the touch and the faded stamps become part of the plant scene, like quiet companions. I enjoy how they weather gently over time, taking on small smudges from watering days and sunlight.
Placed among green leaves they create small moments of charm that make tending plants feel even more like a personal ritual.
Steps
- Select corks and slice them in half lengthwise to create flat labeling surfaces.
- Press or draw plant names onto the flat faces for clear identification.
- Insert a slender stake or skewer into the back of each cork half for planting.
- Position tags in pots at the edge of the soil so names remain visible.
A soft cork bath mat that stays surprisingly cozy

Standing on a cork mat after a shower brings a quiet pleasure. The surface provides a muted springiness underfoot and the warm, dry texture avoids chilly tiles.
Tiny pores and patchwork tones give the mat an organic personality that fits naturally into a bathroom with wooden accents. I find the scent faintly woody, almost like a small cabin corner, and it blends with steam for a comforting atmospheric note.
When stepping out, the mat feels steady and inviting, a modest luxury that quietly elevates daily routines.
Steps
- Gather a large quantity of corks and slice them into flat sections of uniform thickness.
- Arrange the sections tightly on a waterproof backing to cover the desired mat size.
- Bond the cork pieces securely to the backing and ensure edges are neat and sealed.
- Allow full cure time before placing in the bathroom and occasionally air out to maintain freshness.
Drawer pulls that add low-key personality
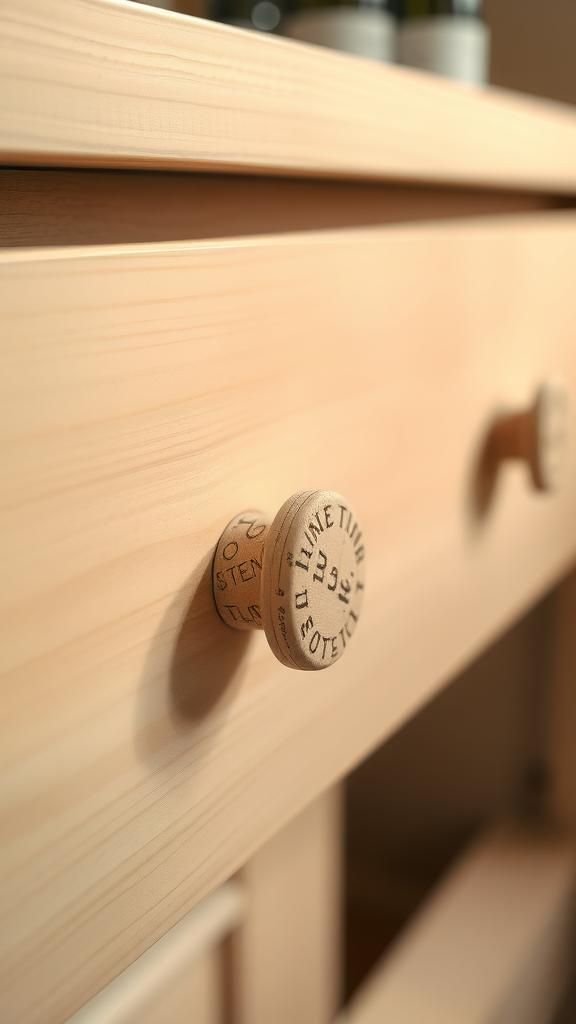
Replacing metal knobs with cork pulls introduces a friendly, muted accent to furniture. The rounded corks feel soft under the palm and the tactile quality invites casual contact.
When opening drawers the muffled sound is oddly satisfying, and the contrast between smooth wood and textured cork brings a subtle visual interest. Little wine-stamped marks peek out at odd angles, hinting at stories.
The pulls have a quiet durability and sit comfortably in a kitchen or bathroom setting, blending in as if they belonged there for years.
Steps
- Bore a pilot hole through the center of selected corks to accommodate a screw or bolt.
- Insert a machine screw or wood screw into each cork, allowing enough thread for fastening.
- Fasten the cork to the drawer face with a washer on the inside for stability.
- Tighten gently to secure without compressing the cork overly much.
Cork wine bottle stoppers with a custom touch
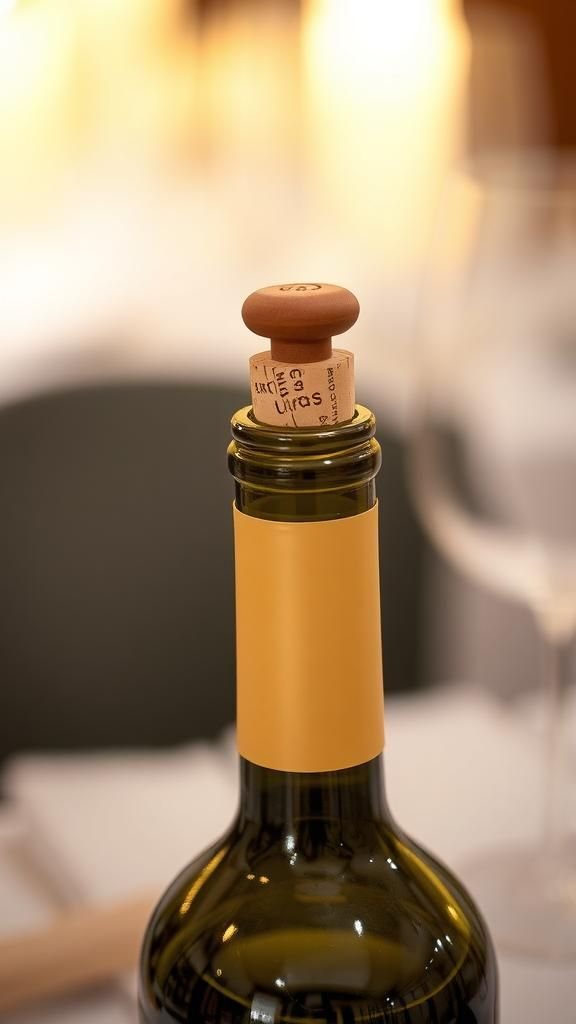
A cork stopper brings a familiar weight to the mouth of a bottle. The textured surface feels comfortable between fingers and the scent is a faint echo of cellar evenings.
Topped with metal or wooden embellishments, the stopper becomes a small statement: a stripe here or a tiny bead there. I like how it sits slightly proud of the bottle neck, balancing practicality with a handmade look.
The simple act of sealing a bottle with a crafted stopper feels calming, as if it pauses a good conversation for another day.
Steps
- Select straight corks and trim ends for a clean fit to bottle necks.
- Insert a decorative topper onto the cork by anchoring a screw eye or dowel.
- Ensure a snug fit by compressing the cork slightly and testing on a bottle.
- Sand any rough edges and finish the topper for a polished appearance.
Candle holders that glow with soft candlelight

A ring of cork around a tealight gives off a warm, earthy presence when lit. The tiny cavities of the cork play with light in a subtle way, and the collective honey tones soften the candle’s glow.
From a short distance the scent carries a memory of cellar coolness mixed with wax; close up the heat is a delicate reminder of the light source. Arranged in clusters, the holders create cozy pools of brightness, settling a room into quieter conversation and slow gestures, the kind that stretch into evening.
Steps
- Hollow out shallow wells in cork blocks to accommodate tealight cups safely.
- Arrange corks in a circular or linear pattern around the wells for support.
- Secure the cork pieces to a non-flammable base and ensure proper spacing for ventilation.
- Test with a candle in a safe setting and adjust spacing to prevent overheating.
Fridge magnets with tiny cork canvases

Small cork discs carry a soft, pleasant texture and sit nicely against a fridge door. They absorb tiny knocks without sounding harsh and bring a warm palette to a kitchen surface.
The little end grain faces are almost like tiny landscapes, each one subtly different. When I press a magnet close, the cool metal contrasts with the soft cork and the whole vignette feels playful.
They hold lightweight notes and tickets with a quiet, unshowy presence that makes everyday pinning feel a little friendlier.
Steps
- Slice corks into thin discs or small shapes for magnet faces.
- Adhere strong flat magnets to the back of each cork piece securely.
- Allow adhesive to cure fully before placing on metal surfaces.
- Arrange magnets on the fridge to hold notes and photos as desired.
Handmade Christmas ornaments with cozy textures

Tiny cork ornaments hang with a quiet simplicity that feels just right for a low-key tree. The pale hues pair well with evergreen and soft lights, and the stamped marks read like little badges of celebration.
I enjoy the gentle heft as ornaments sway, the mellow sound as they brush one another, and the overall sense of handcrafted charm. Placed among paper stars and fabric hearts, the cork pieces add an organic counterpoint that makes a tree look lived in and warm, like a shelf of small memories.
Steps
- Slice corks into desired ornament shapes and smooth any rough edges.
- Add a small eye pin or loop to the top for hanging hardware.
- Thread twine or ribbon through the loop and tie securely for a hanger.
- Optionally add small decorative elements such as beads or painted details.
A cork bracelet that feels light and familiar
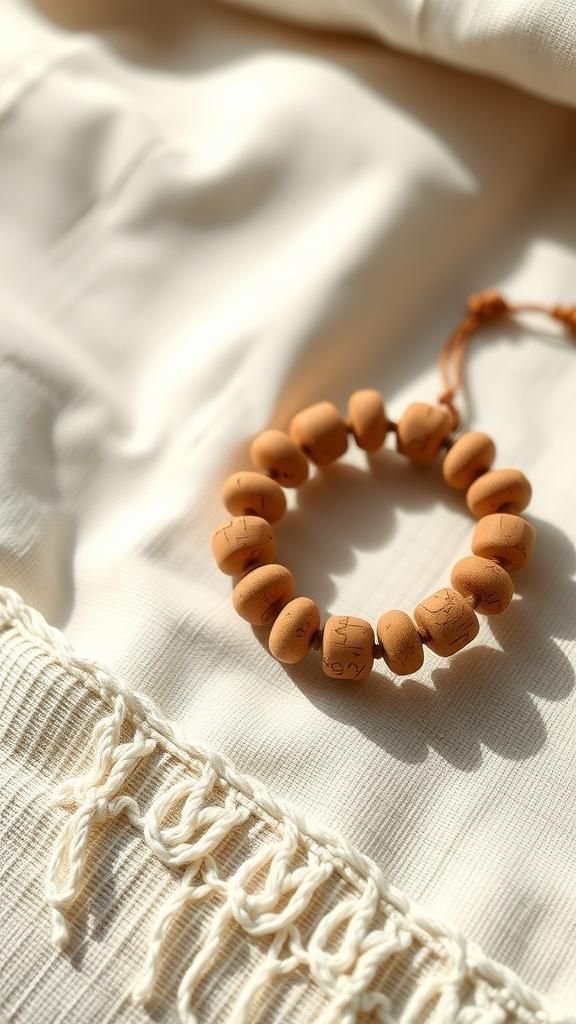
Wearing a bracelet of cork beads brings an unexpected comfort to the wrist. The beads are pleasantly light, and the surface is soft against skin with a slightly grainy texture that catches the eye.
I notice the subtle variations in color and tiny marks that suggest stories without being loud. The bracelet pairs well with denim or a linen shirt, adding a casual, grounded accent.
It sits quietly during the day, only making a small, understated sound when my hand brushes against a surface.
Steps
- Slice corks into bead-sized rounds or drill through whole corks to create bead holes.
- Thread an elastic cord or strong thread through the beads to form a bracelet strand.
- Knot the cord securely and hide the knot inside a bead if possible for a clean finish.
- Trim excess cord and gently tug to ensure the fit and knot stability.
Mini succulent planters carved from cork stacks

Tiny planters made from stacked corks create miniature homes for little succulents. The natural tones of the cork form a gentle backdrop to vibrant green leaves, and their small scale invites close inspection.
I like how the porous material seems to breathe in a visual sense, complementing the plant’s tiny ridges. On a sunny windowsill these planters cluster like a small village, each with its own character.
They bring a playful intimacy to plant displays, a small scene that rewards a second look with warm familiarity.
Steps
- Stack corks and carve a shallow cavity in the top stack to host a tiny succulent or soil plug.
- Secure the stacked corks together for stability with an adhesive or dowel.
- Fill the cavity with a bit of soil and seat the succulent carefully in place.
- Position planters on a bright windowsill and water sparingly to avoid over-saturation.
Place card holders for cozy dinner parties

Little cork holders at each place setting feel like a thoughtful whisper. They rest easily beside plates, their warm neutral tone balancing ceramic and linen.
When friends arrive, the small cards tucked into the corks seem to make the table feel intentionally arranged without fuss. The soft texture is pleasant when rearranging seats, and the low profile keeps sightlines open across the table.
I like the way they can be scattered with sprigs or tiny leaves, adding an extra hint of the outdoors to a meal.
Steps
- Slice a narrow slot into the end grain of corks to create a card-holding groove.
- Prepare place cards and insert them gently into the slots for balance.
- Arrange the cork holders at each place setting and adjust spacing to personal taste.
- Optionally adorn with small sprigs or labels for added seasonal flair.
Chess set pieces crafted from corks and charm

A chessboard dotted with cork pieces feels delightfully approachable. The light cork knights and pawns have a friendly, unpretentious look that invites play.
The different ends and stamps give each piece a little personality, and sliding them across a board creates a soft, muted sound. I enjoy watching how a game with homemade pieces gathers attention; the tactile nature slows a match into something gently deliberate.
Placed on a coffee table, the set seems like an open invitation to pause a moment and move a piece or two.
Steps
- Select corks of different heights and shapes to represent the variety of chess pieces.
- Carve or mark distinct silhouettes for kings, queens, rooks, bishops, knights, and pawns.
- Optionally paint or stain pieces lightly for contrast and allow drying before play.
- Store pieces in a small box or on the board when not in use.
Monogram wall letters with tactile cork faces
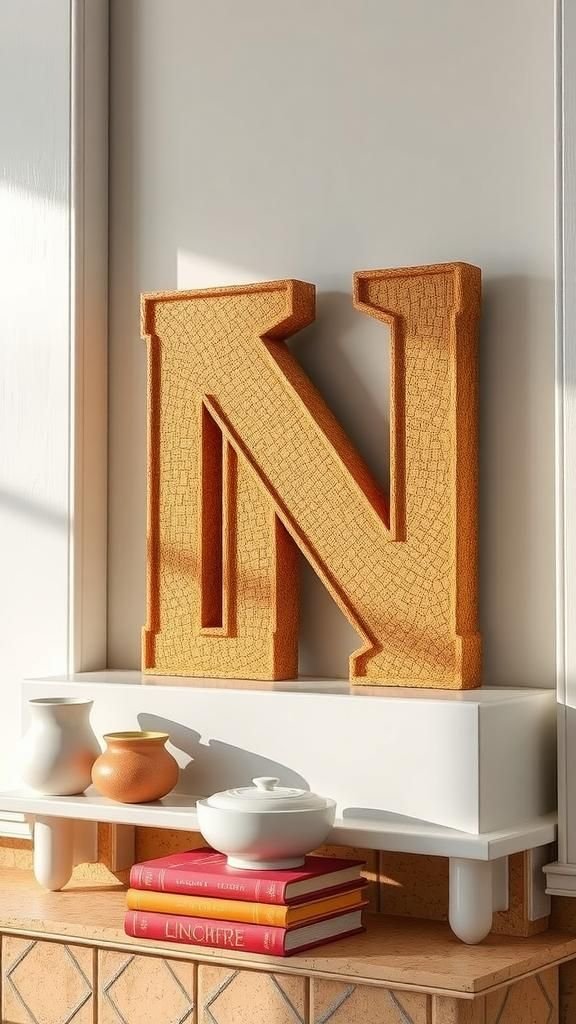
A letter made of cork reads like a quiet statement on the wall. The texture brings a softness to typographic shapes and the light tan tones complement painted surfaces.
When sunlight grazes the edges the tiny grain catches shadows, giving the letter gentle depth. I like how a single initial can anchor a shelf or nursery corner with an unpretentious, relaxed feel.
It blends into a gallery with pictures and ceramics, offering a tactile counterpoint that invites fingers to trace outlines absentmindedly.
Steps
- Cut or source wooden letter bases sized to your wall space and sand edges smooth.
- Slice corks into thin tiles and adhere them to the letter surface in a tight pattern.
- Trim any cork overhang and finish the edges for a clean silhouette.
- Hang the letter flush to the wall using appropriate hardware for the weight.
A drifting photo display with cork mobiles

Photos clipped to a string of cork elements have a gentle, kinetic quality. The cork pieces act as little anchors that move with a draft, making the display feel alive.
The warm, matte tones frame images without dominating them, and the faint cork scent blends into whatever room it hangs in. I find the slight motion soothing; pictures sway slowly like leaves on a calm day.
This kind of display feels informal and personal, perfect for postcards, snapshots, and notes that rotate with memory and mood.
Steps
- Prepare cork slices and small clips or pins to hold photographs securely.
- String twine or thin wire and space cork elements along its length as decorative anchors.
- Attach photos with clips to the string, balancing weight and spacing for visual harmony.
- Suspend the display from hooks or a rod so it can drift slightly with air movement.
Geometric trivet patterns with playful contrasts
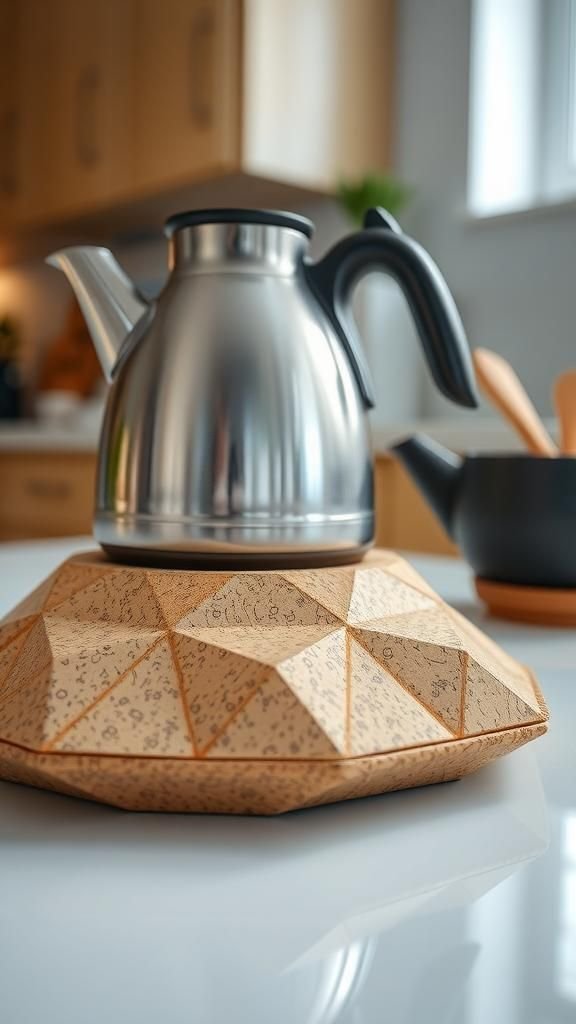
Layered cork shapes set into geometric patterns have a modern-meets-handmade appeal. The repeating forms create a rhythm that catches the eye, and the neutral palette keeps it calm against a busy countertop.
When placing a kettle down, the trivet feels resilient and pleasantly matte. I enjoy how different grain directions and slight color shifts add subtle movement to the pattern.
It sits like a small architectural object on the table, practical yet decorative, inviting a glance and occasional appreciation for its quiet geometry.
Steps
- Cut corks into consistent geometric shapes such as triangles or hexagons.
- Lay the shapes on a backing in the chosen pattern, adjusting for a tight fit.
- Bond the pieces firmly to the backing and allow adhesive to set fully.
- Smooth edges and optionally apply a protective finish for easier cleaning.
A wreath of corks that greets the front door

A wreath made from clustered corks feels unexpectedly warm on a front door. The taped ends and tiny imprints create an irregular surface that catches light and casts small shadows.
When hung among seasonal greenery it reads as modest and earthy, a calm contrast to flashier decorations. The texture invites a second look, as fingers hover over the tiny ends, noting differences in tone and wear.
It conveys an unhurried welcome that feels right for a porch or hallway, quietly signaling hospitality without fuss.
Steps
- Arrange corks around a circular base, orienting ends outward for texture and fullness.
- Secure corks in layers to build up density and achieve a balanced wreath shape.
- Add a loop or ribbon for hanging and embellish with sprigs or small decorations as desired.
- Hang on a door or wall and adjust for even appearance.