Kicking off a fun weekend project with DIY resin coaster and tray crafts brings instant colorful satisfaction and handmade charm to any table. Glossy finishes and swirls of pigment paired with small embedded treasures give ordinary surfaces a lively tactile appeal everywhere.
I once spilled a cup of coffee on a favorite coaster and that accident led to experimenting with resin as a creative patch. The slow wait while pieces hardened became oddly calming and a tiny ritual that turned into a habit of crafting small, bright tabletop pieces.
Ocean-inspired blue resin coaster set with shells
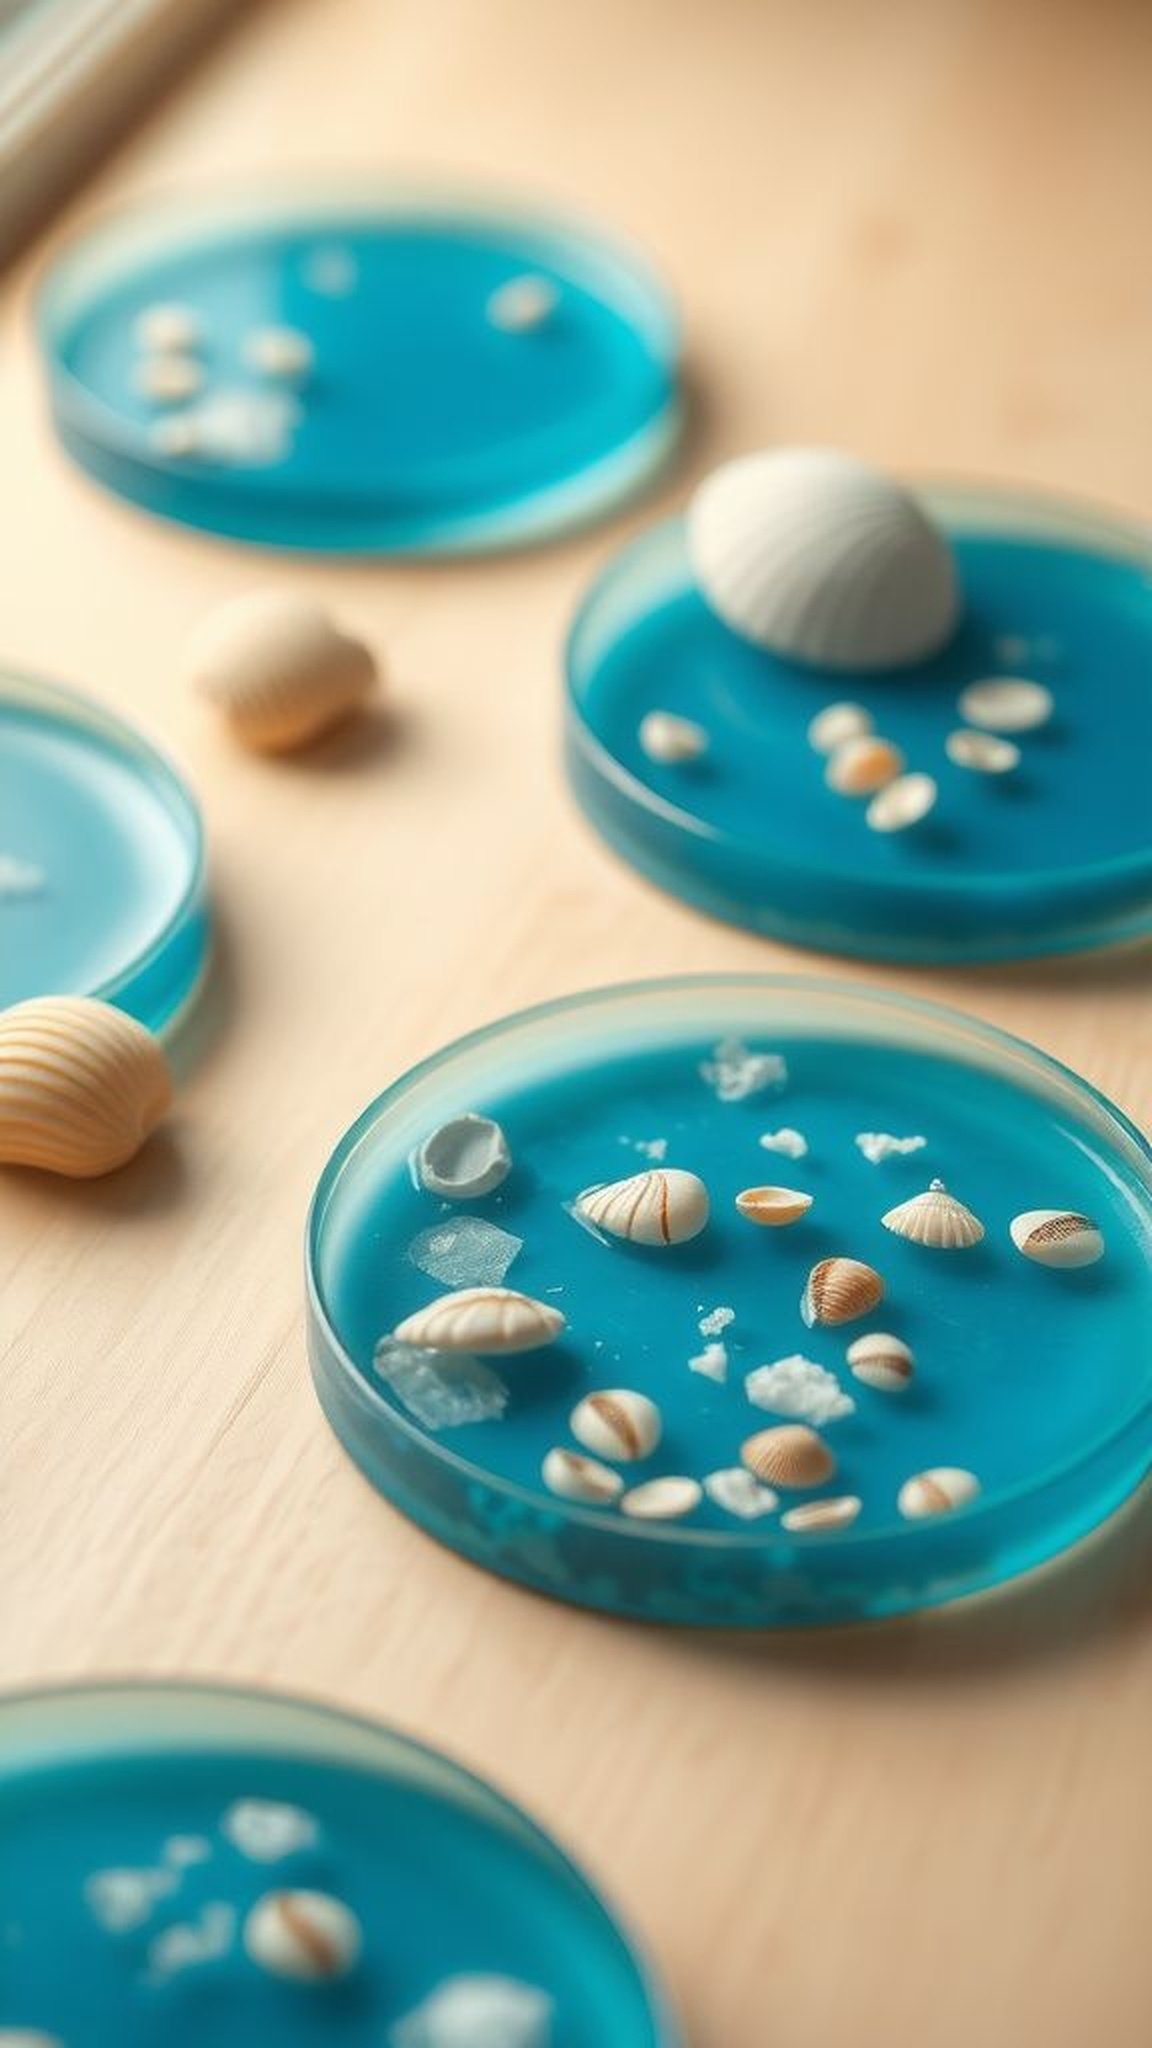
A set that feels like a pocket of sea on the coffee table, each coaster bears the faint texture of tiny shell edges and soft sand flecks. The glossy surface catches light and throws back little sapphire glints while a faint saline scent seems to linger in memory.
Fingers find the cool, glassy plane soothing on a warm afternoon, and the embedded shells sit like miniature keepsakes, their ridges visible under translucent aqua layers. A gentle heft makes each piece feel deliberately made rather than factory-made.
Steps
- Prepare a clean workspace and gather clear epoxy resin, hardener, pigments, small shells, silicone coaster molds, mixing cups and stirring sticks.
- Measure resin and hardener accurately and stir slowly to minimize bubbles until the mixture is consistent in clarity and flow.
- Add blue pigments and a tiny pinch of mica for shimmer and swirl gently before placing a few shells into each mold.
- Pour the tinted resin into molds, allow bubbles to rise and pop using a heat source, then leave the cast to cure until solid.
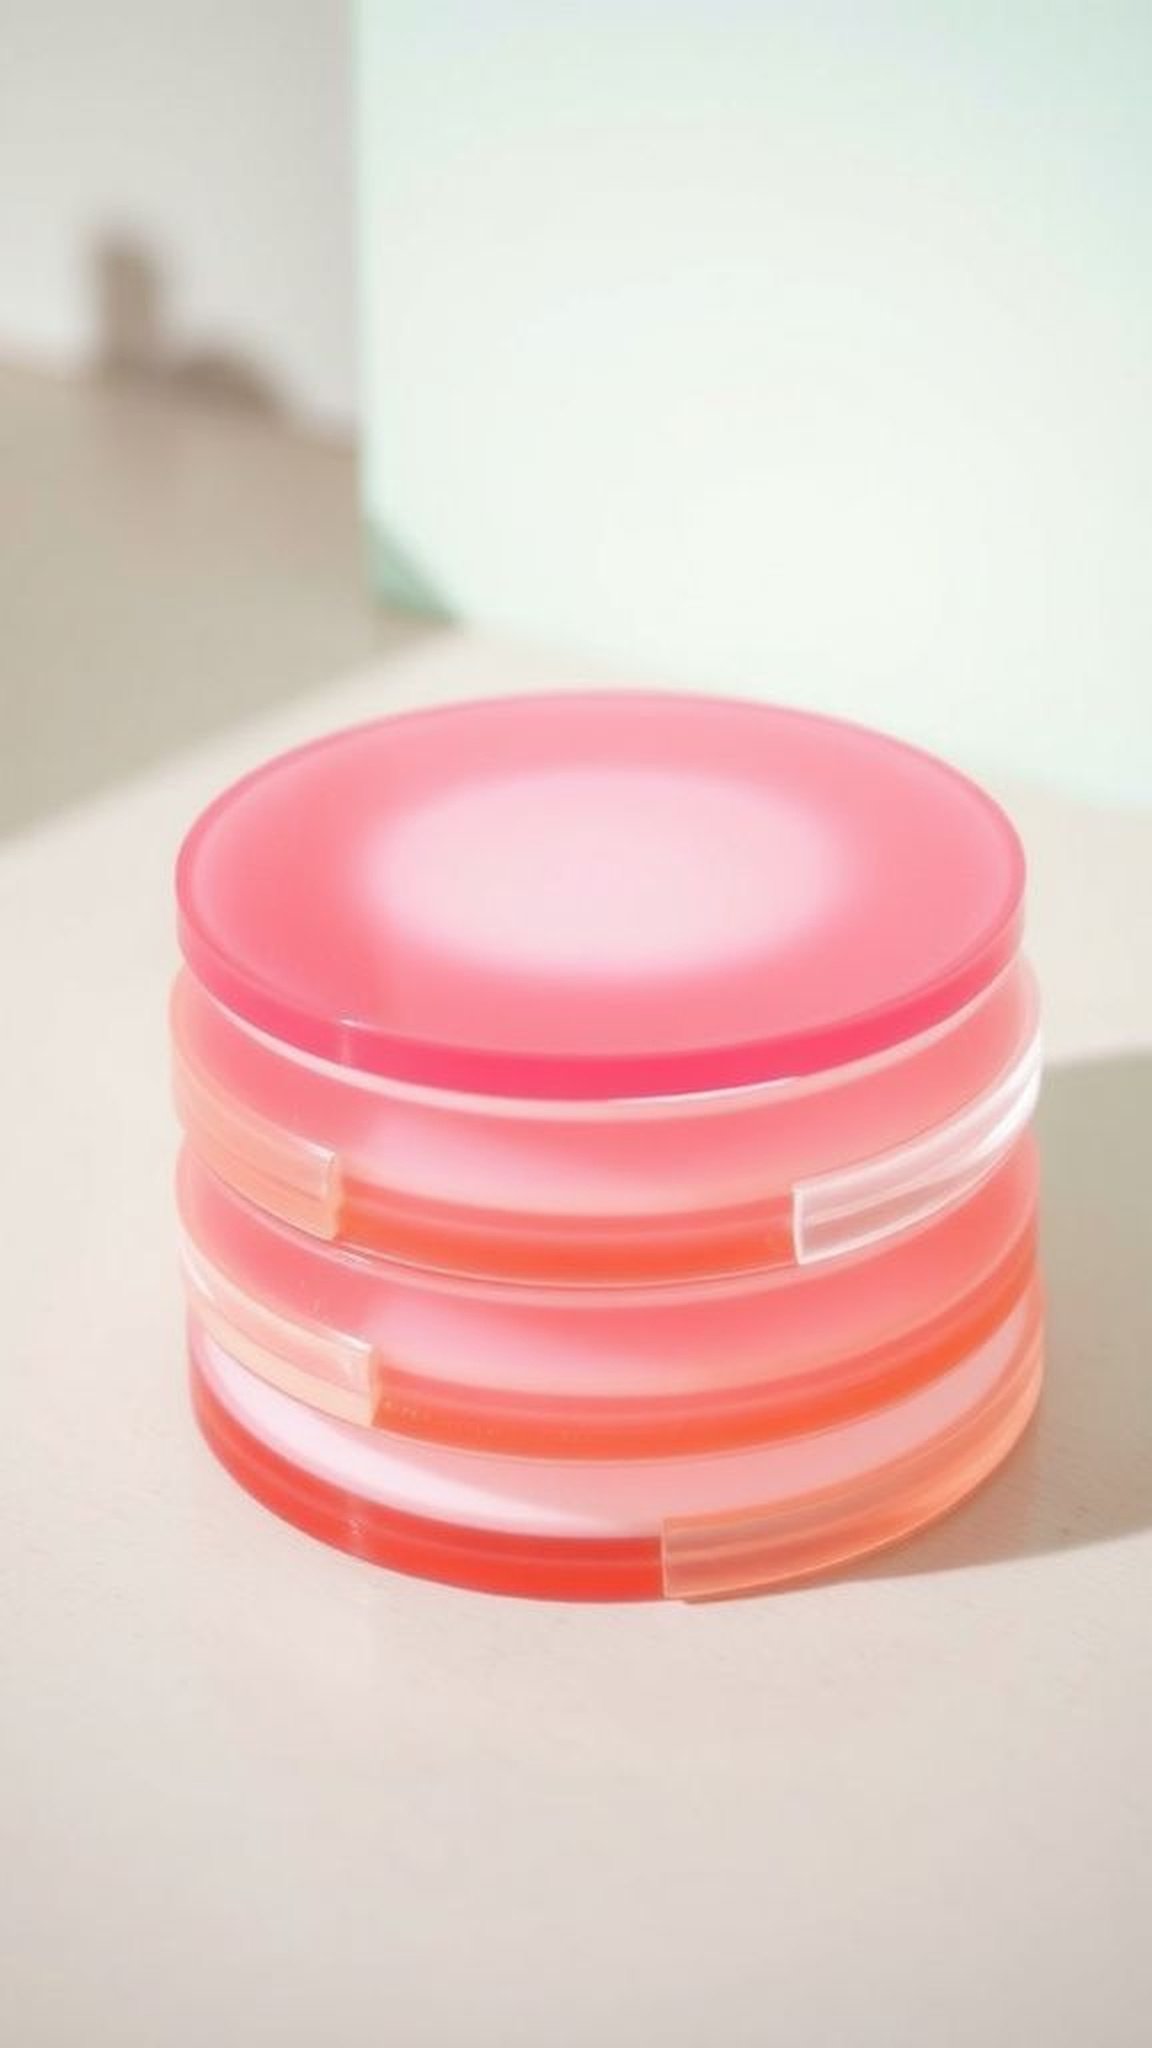
Marbled sunset coaster trio with metallic accents
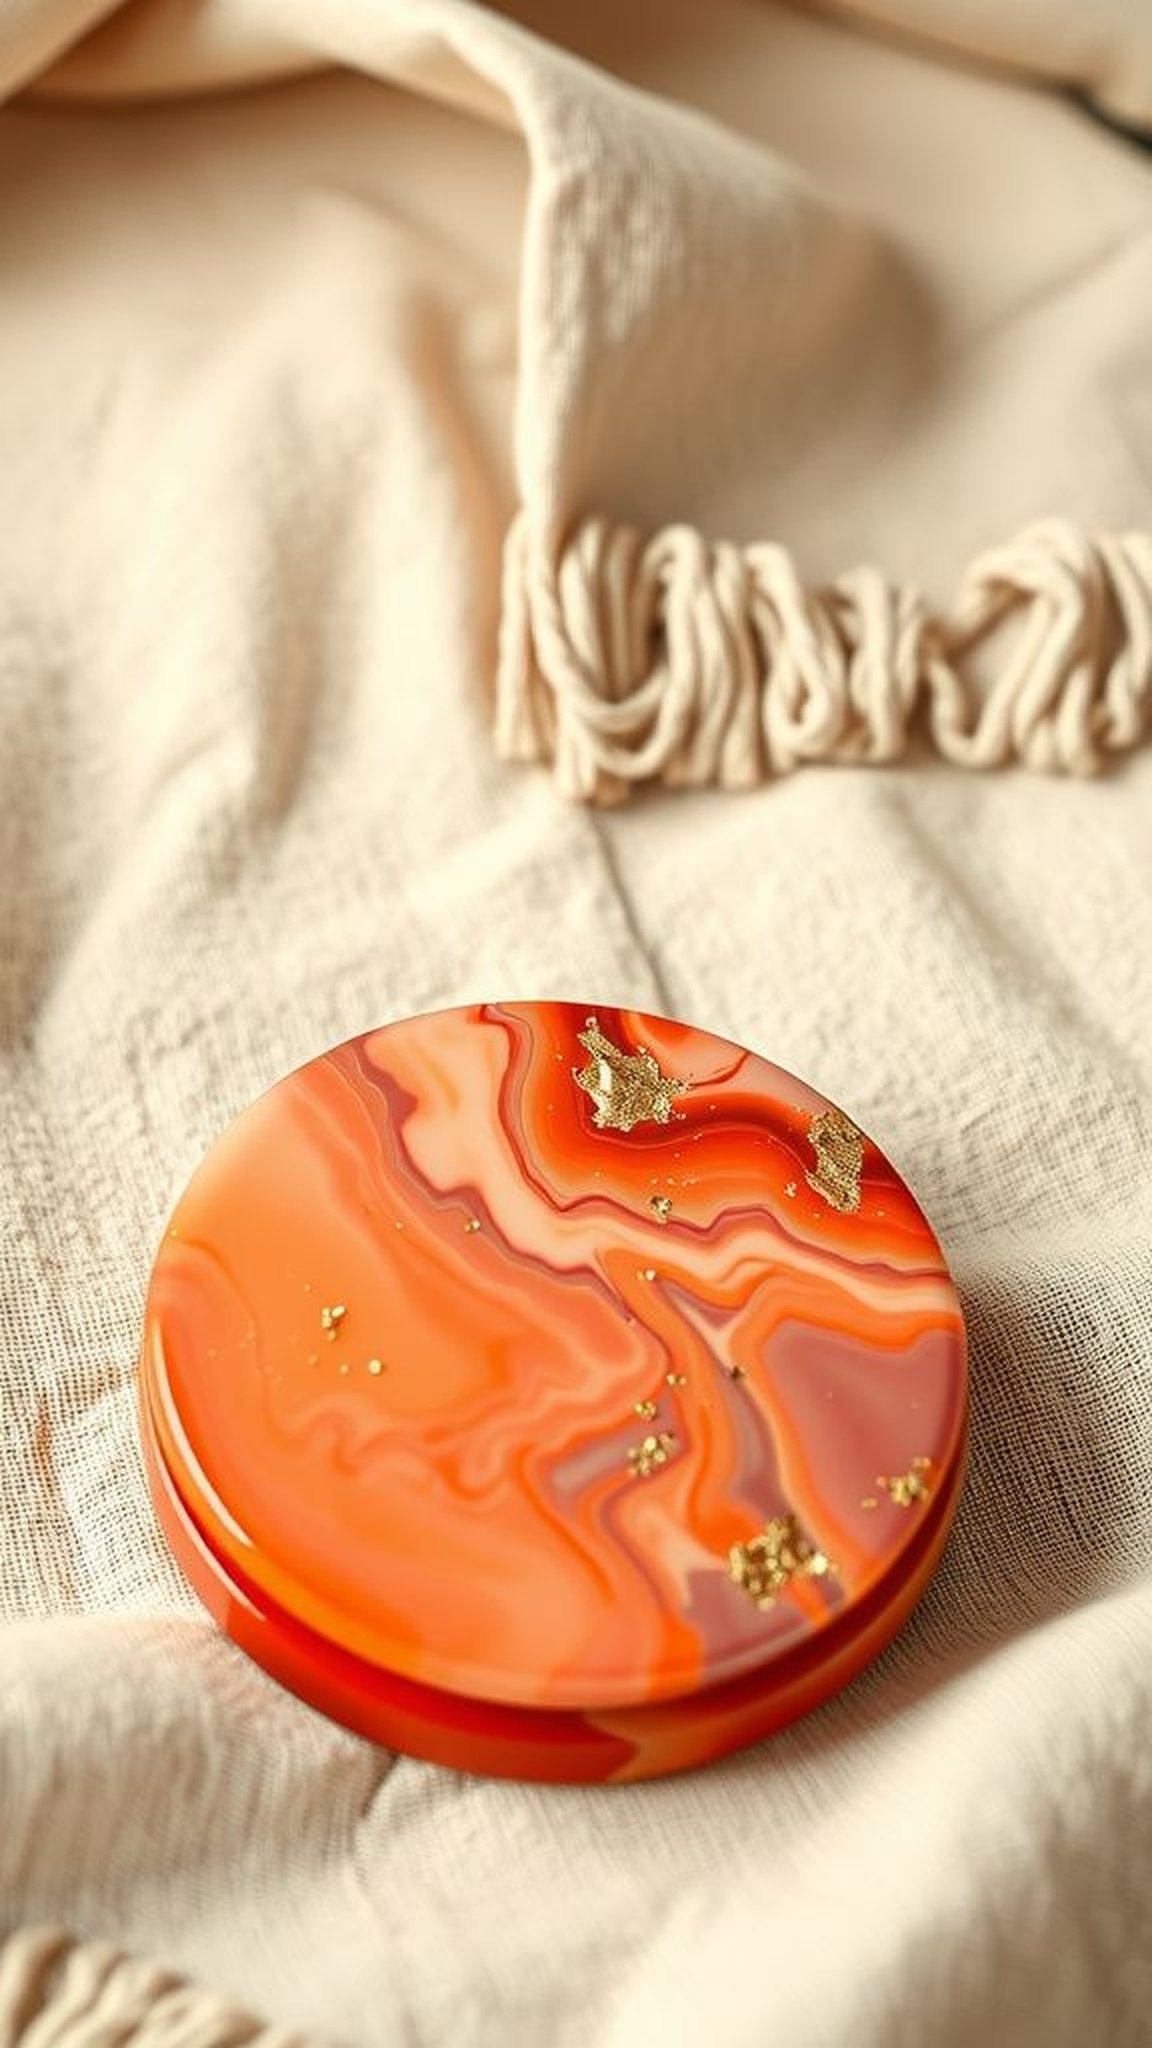
Three coasters that feel like harvested slivers of evening sky, each one layered with warm orange, coral and dusky purple veins. Tiny specks of metallic leaf catch the light in fleeting flashes that shift with every tilt.
The surface keeps a cool, sleek gloss while the edges reveal faint ribbons of color where pigments settled. There is a small sense of ceremony when placing a mug on them; the colors seem to soften the room and make moments feel slightly more deliberate and relaxed.
Steps
- Gather epoxy resin, sunset-hued pigments, metallic leaf flakes, round silicone molds and mixing supplies in a well-ventilated space.
- Mix resin and hardener thoroughly according to the product instructions until fully blended and free of streaks.
- Divide resin into portions and tint each with a different warm pigment, then drop metallic leaf flakes into selected areas for accent.
- Pour tinted resins into molds with a gentle swirling motion to achieve marble veins and cure until hard before demolding.
Pressed flower tray with translucent resin finish
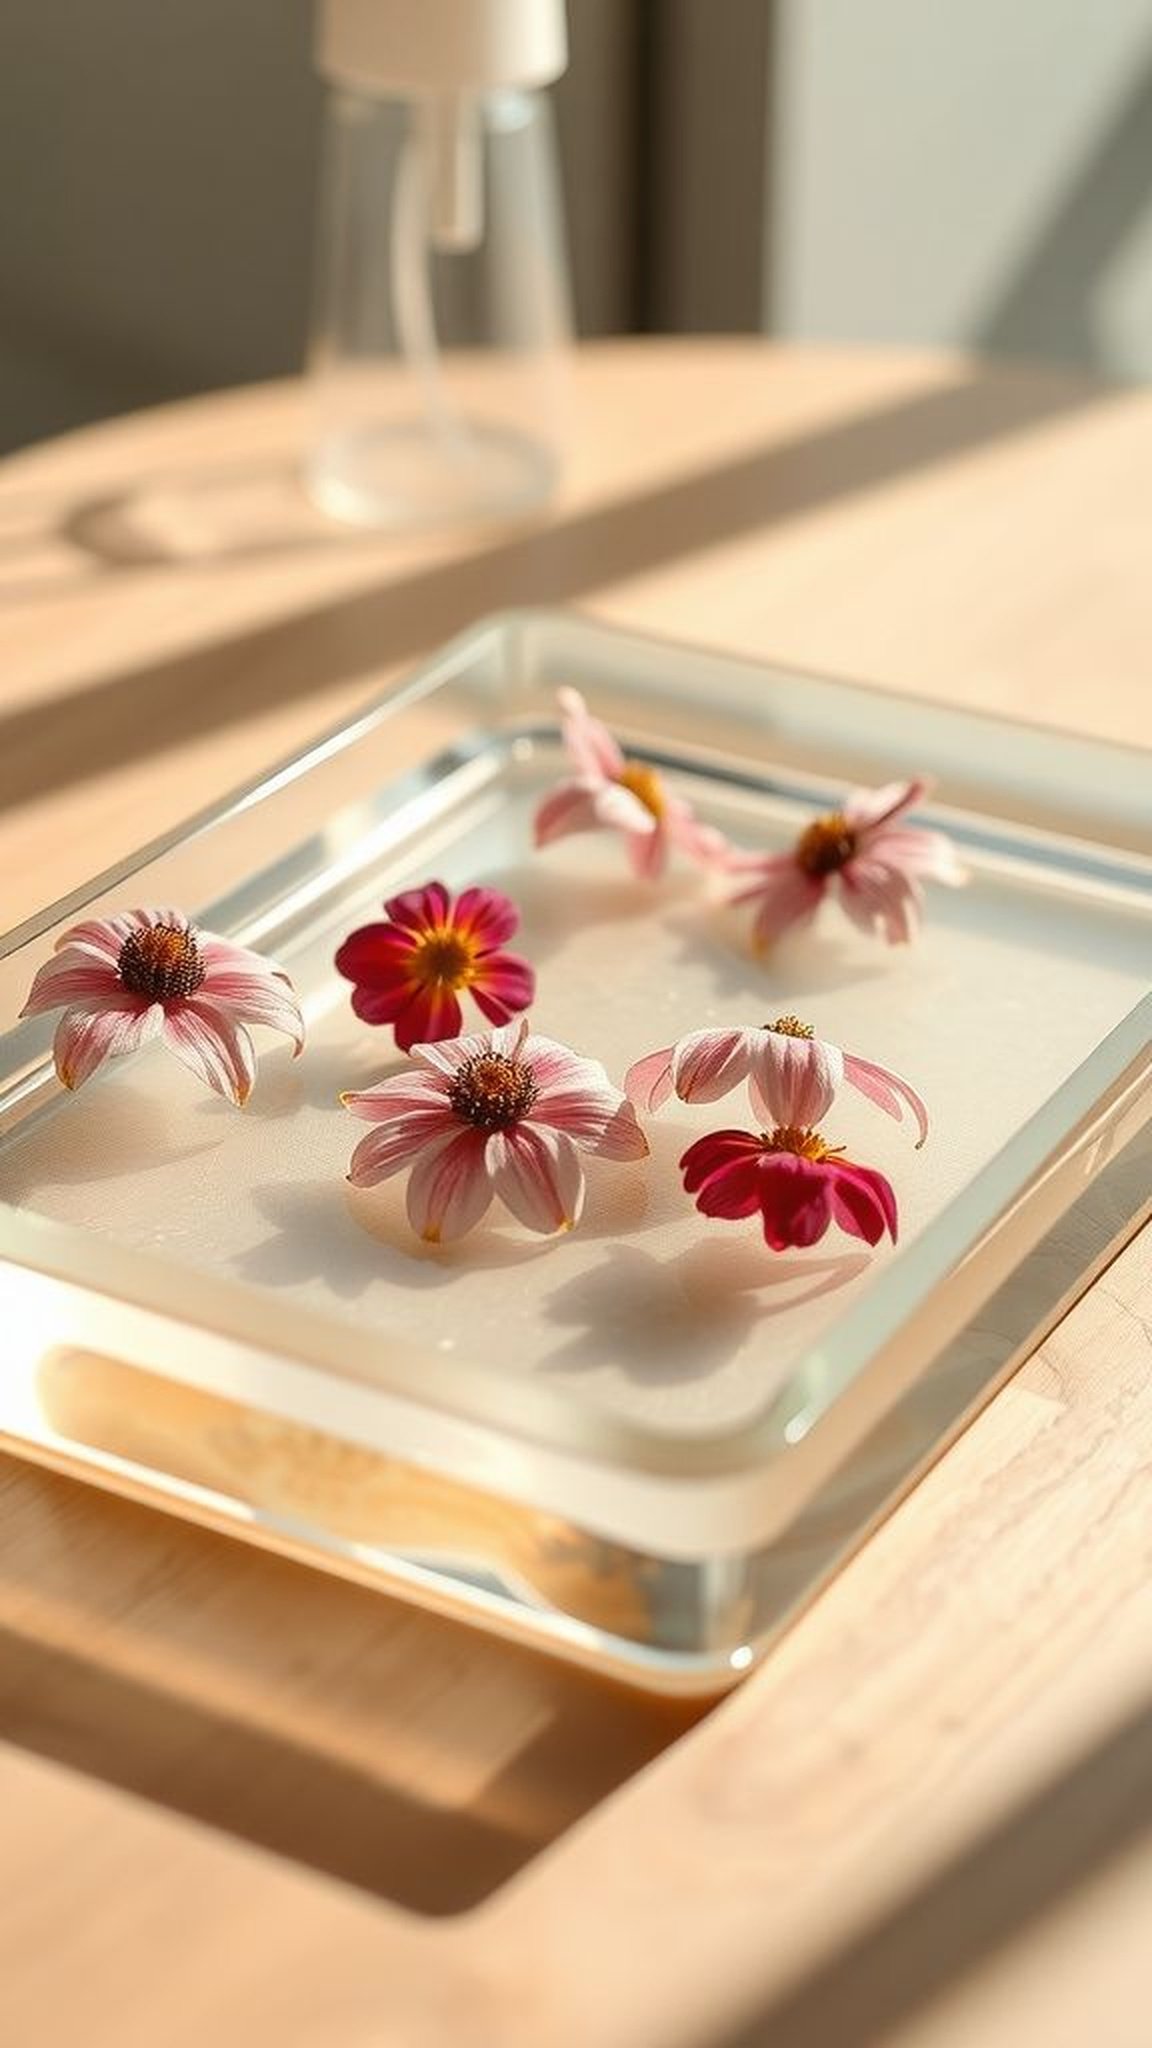
A shallow tray where tiny pressed petals hover beneath a glassy surface, each bloom frozen as if mid-breeze. The contrast between delicate matte petals and the smooth resin top is quietly pleasing, offering a soft floral scent memory without the mess of fresh blooms.
Light passes through the tray and casts faint petal-shaped shadows on the table beneath. The tray carries a domestic tenderness and often becomes a small ritual surface for keys, jewelry or a single mug, bringing a little garden feeling inside on ordinary days.
Steps
- Select a shallow tray mold, clear epoxy resin, hardener and a collection of well-pressed flowers, plus gloves and mixing cups.
- Mix resin and hardener thoroughly until homogeneous, then pour a thin base layer into the tray mold and allow it to partially set.
- Arrange pressed flowers gently atop the tacky layer so they lie flat, then pour another clear layer to encapsulate the petals completely.
- Remove any surface bubbles with a gentle flame and let the piece cure fully before demolding and light sanding around edges.
Geode-style coaster set with crystal edges
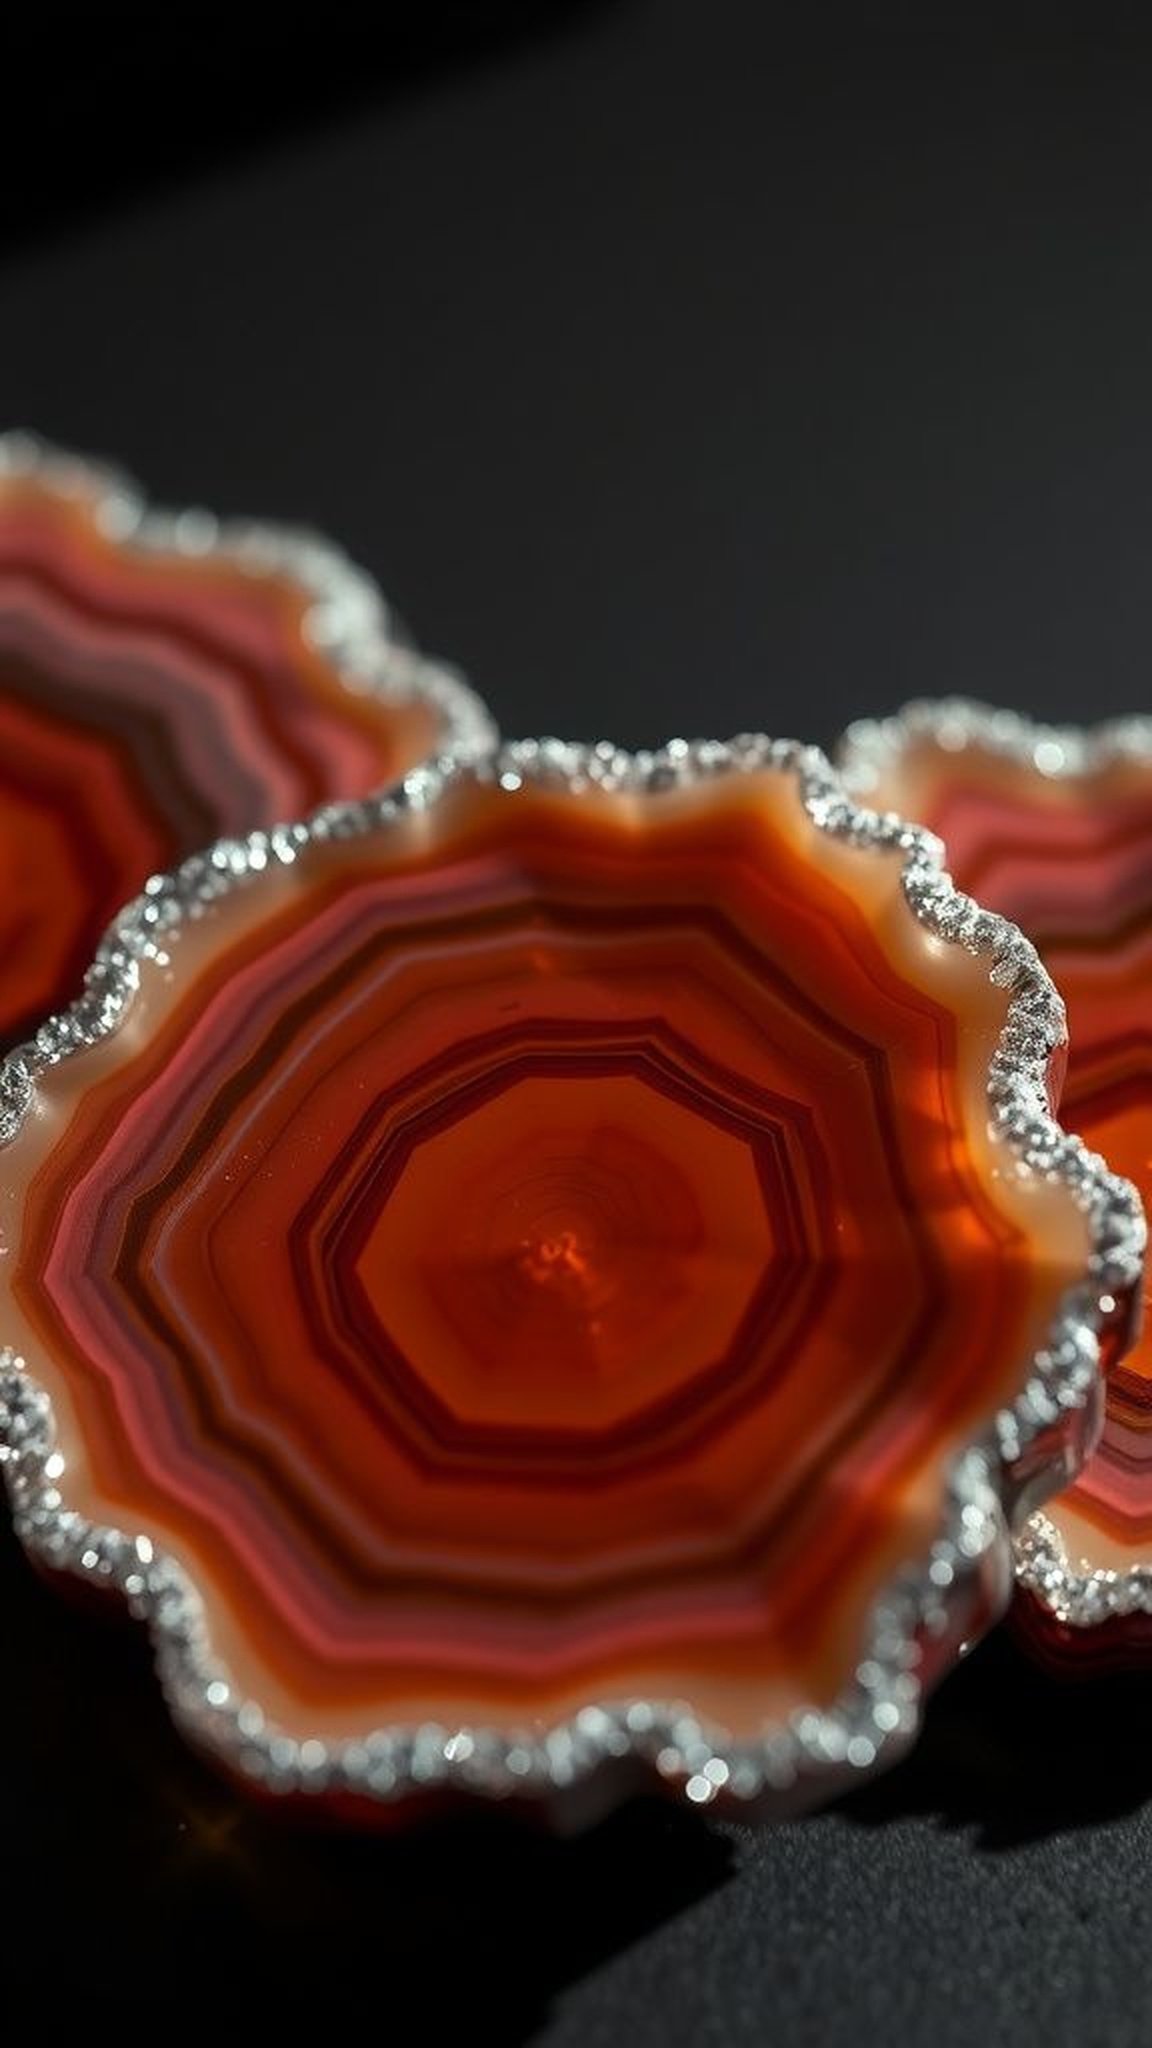
These coasters mimic tiny geological slices, the center pooling with swirling pigments while the edges are rimmed with crushed crystals that catch and scatter light. The surface is cool and reflective, and the crystal trim adds a subtle roughness that invites touch.
When set down, a faint clink can be heard if the coasters meet, and the layered translucency gives a sense of depth that feels like peering into a small, private stone. They hold a bit of ceremony, as if each drink has been given a pedestal.
Steps
- Collect epoxy resin, stone-colored pigments, crushed quartz or glass crystal, circular molds and mixing supplies.
- Mix resin components until clear and consistent, then divide and tint a portion for the central swirl effect.
- Pour tinted resin into molds forming a shallow center, sprinkle crushed crystals around the perimeter and press slightly to secure.
- Allow the pieces to cure fully, then demold and buff edges for a smooth finishing touch.
Minimalist clear tray with subtle color streaks
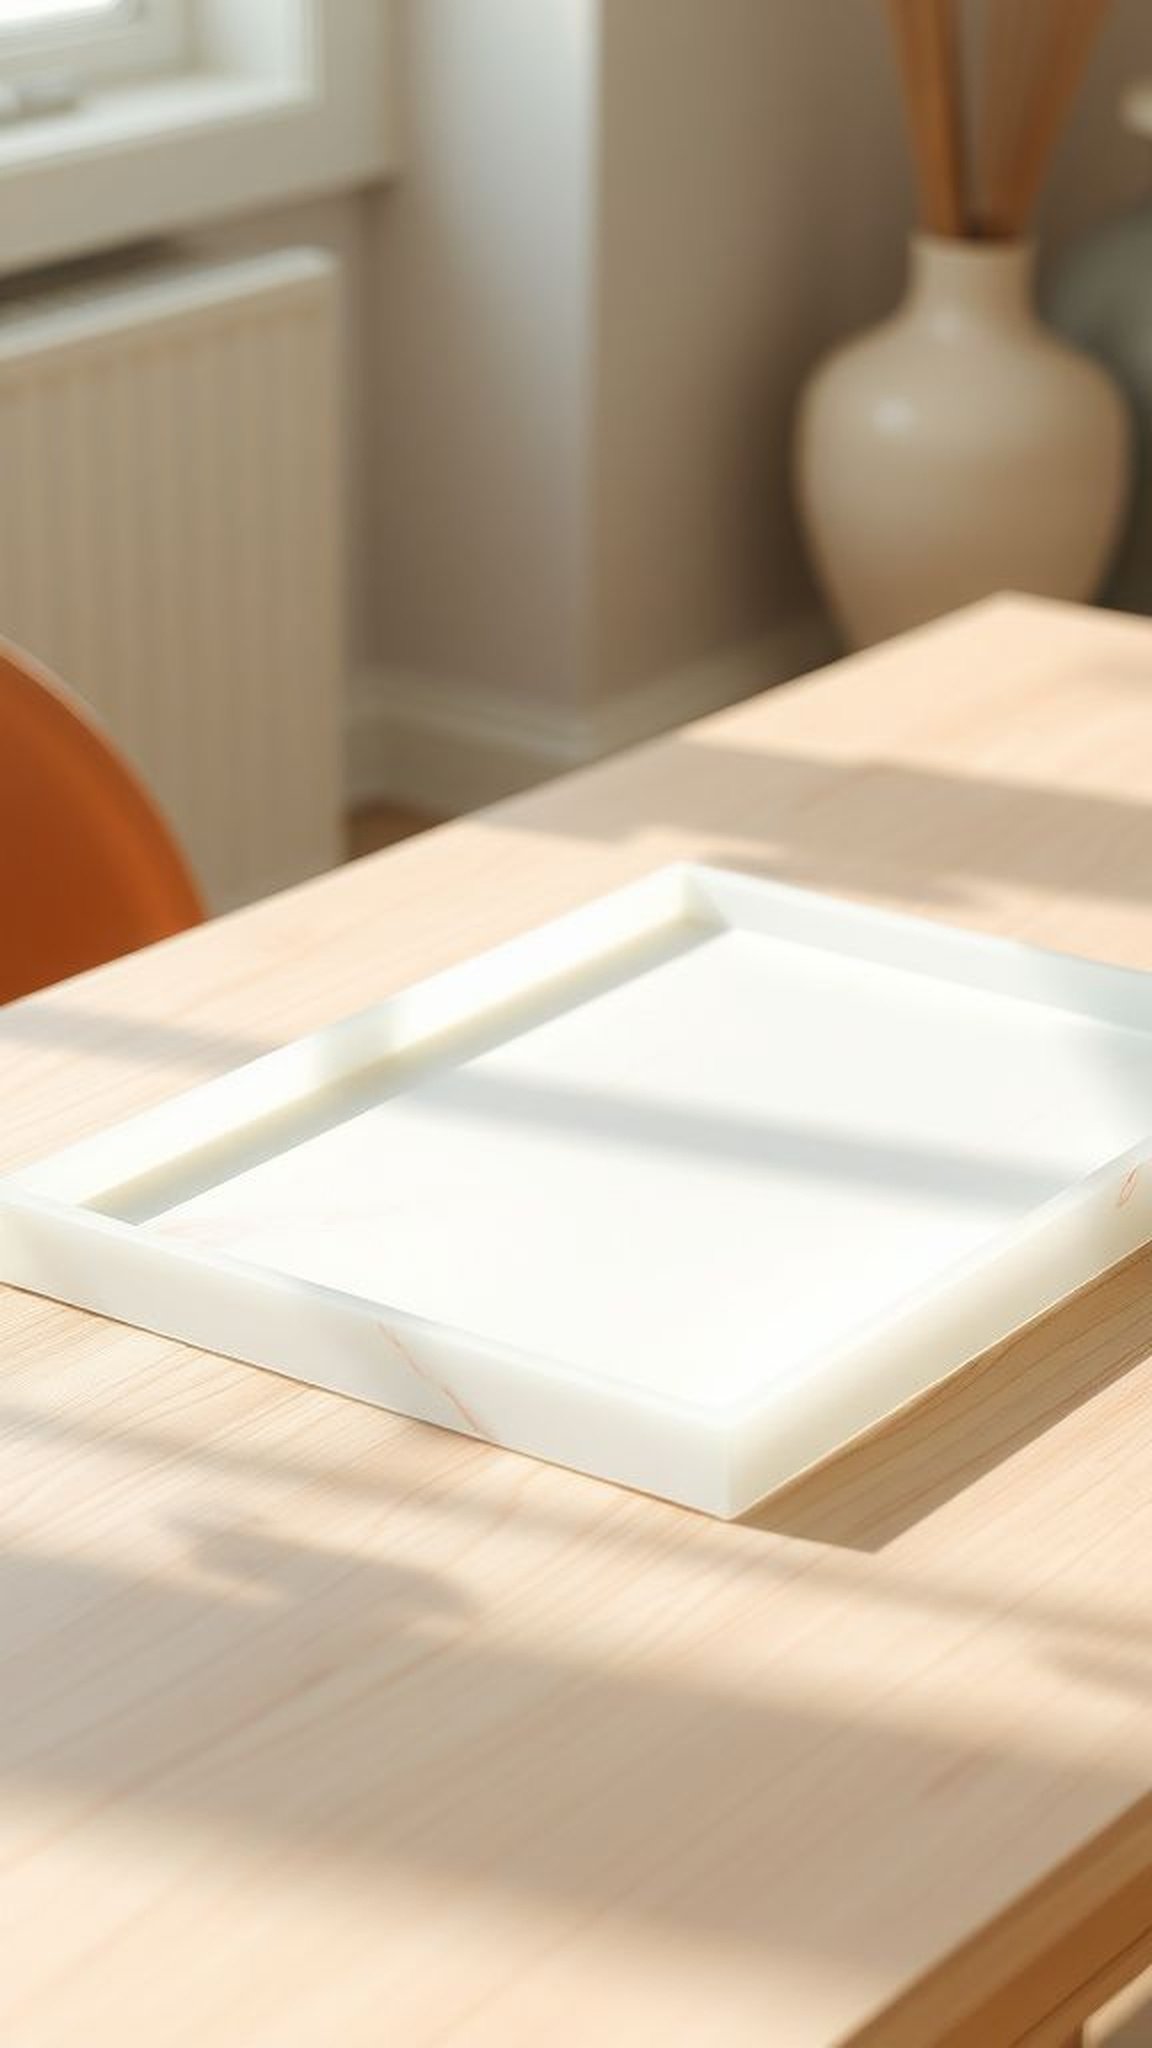
A pared-back tray that rests like a calm pool on the table, mostly clear with a few delicate streaks of pale color drifting through. The simplicity makes small items feel intentional, and the airy transparency creates a floating sensation.
Fingers enjoy the slick, glass-like finish while the faint color hints add warmth rather than dominate. When sunlight moves across its surface, soft bands of color slide across the wood underneath, giving the whole scene a quietly moving presence that stays understated while still being attractive.
Steps
- Arrange a rectangular silicone tray mold, clear epoxy resin, light translucent pigments, mixing cups and a level surface.
- Mix resin and hardener thoroughly until uniform, then add very small amounts of pigment for soft streaks.
- Pour clear resin into the mold and drizzle the tinted resin in thin lines across the surface, allowing natural blending.
- Use a torch briefly to remove bubbles and leave the tray to cure undisturbed until solid.
Wood slice and resin river tray with warm grain

A wide tray where a flowing strip of deep blue resin threads between two pieces of warm wood grain, the contrast between organic texture and glossy resin creating a pleasing tension. The wood brings a tactile, slightly textured feel while the resin sits smooth and mirror-like.
The scent of sanded wood and faint chemical notes of resin might be remembered during the making process, and the finished tray offers a cozy vibe that pairs well with ceramic mugs and casual table settings.
Steps
- Prepare a wooden slab with a central channel, seal any porous areas, and gather epoxy resin, blue pigments, molds or edge forms.
- Mix resin and hardener thoroughly until clear and consistent, then tint to a deep ocean blue for the river effect.
- Pour resin into the central channel in layers if needed, allowing partial curing between pours to avoid heat buildup.
- Once fully cured, sand the resin edge flush with the wood and apply a final polish for sheen.
Glow-in-the-dark resin coasters for evening use

These coasters carry a playful secret: a faint daytime shimmer that turns into a soft, welcoming glow as lights dim. The daytime surface remains glossy and smooth, while in low light the embedded glow pigments emit a gentle greenish luminescence.
That subtle radiance makes late-night cups and small gatherings feel a bit whimsical, calling attention without being garish. Holding one up reveals a layered interior where the glow particles sit suspended like tiny lanterns, adding a touch of wonder to ordinary evenings.
Steps
- Gather clear epoxy resin, glow-in-the-dark pigment powder, silicone coaster molds, mixing cups and personal protective equipment.
- Mix resin and hardener carefully until uniform, then sift glow pigment into the mixture until it disperses evenly.
- Pour the luminous resin into molds to desired thickness and tap molds gently to release trapped bubbles.
- Allow the pieces to cure completely and charge them under bright light to test the glow effect.
Sanded edge resin coaster with embedded leaf veins
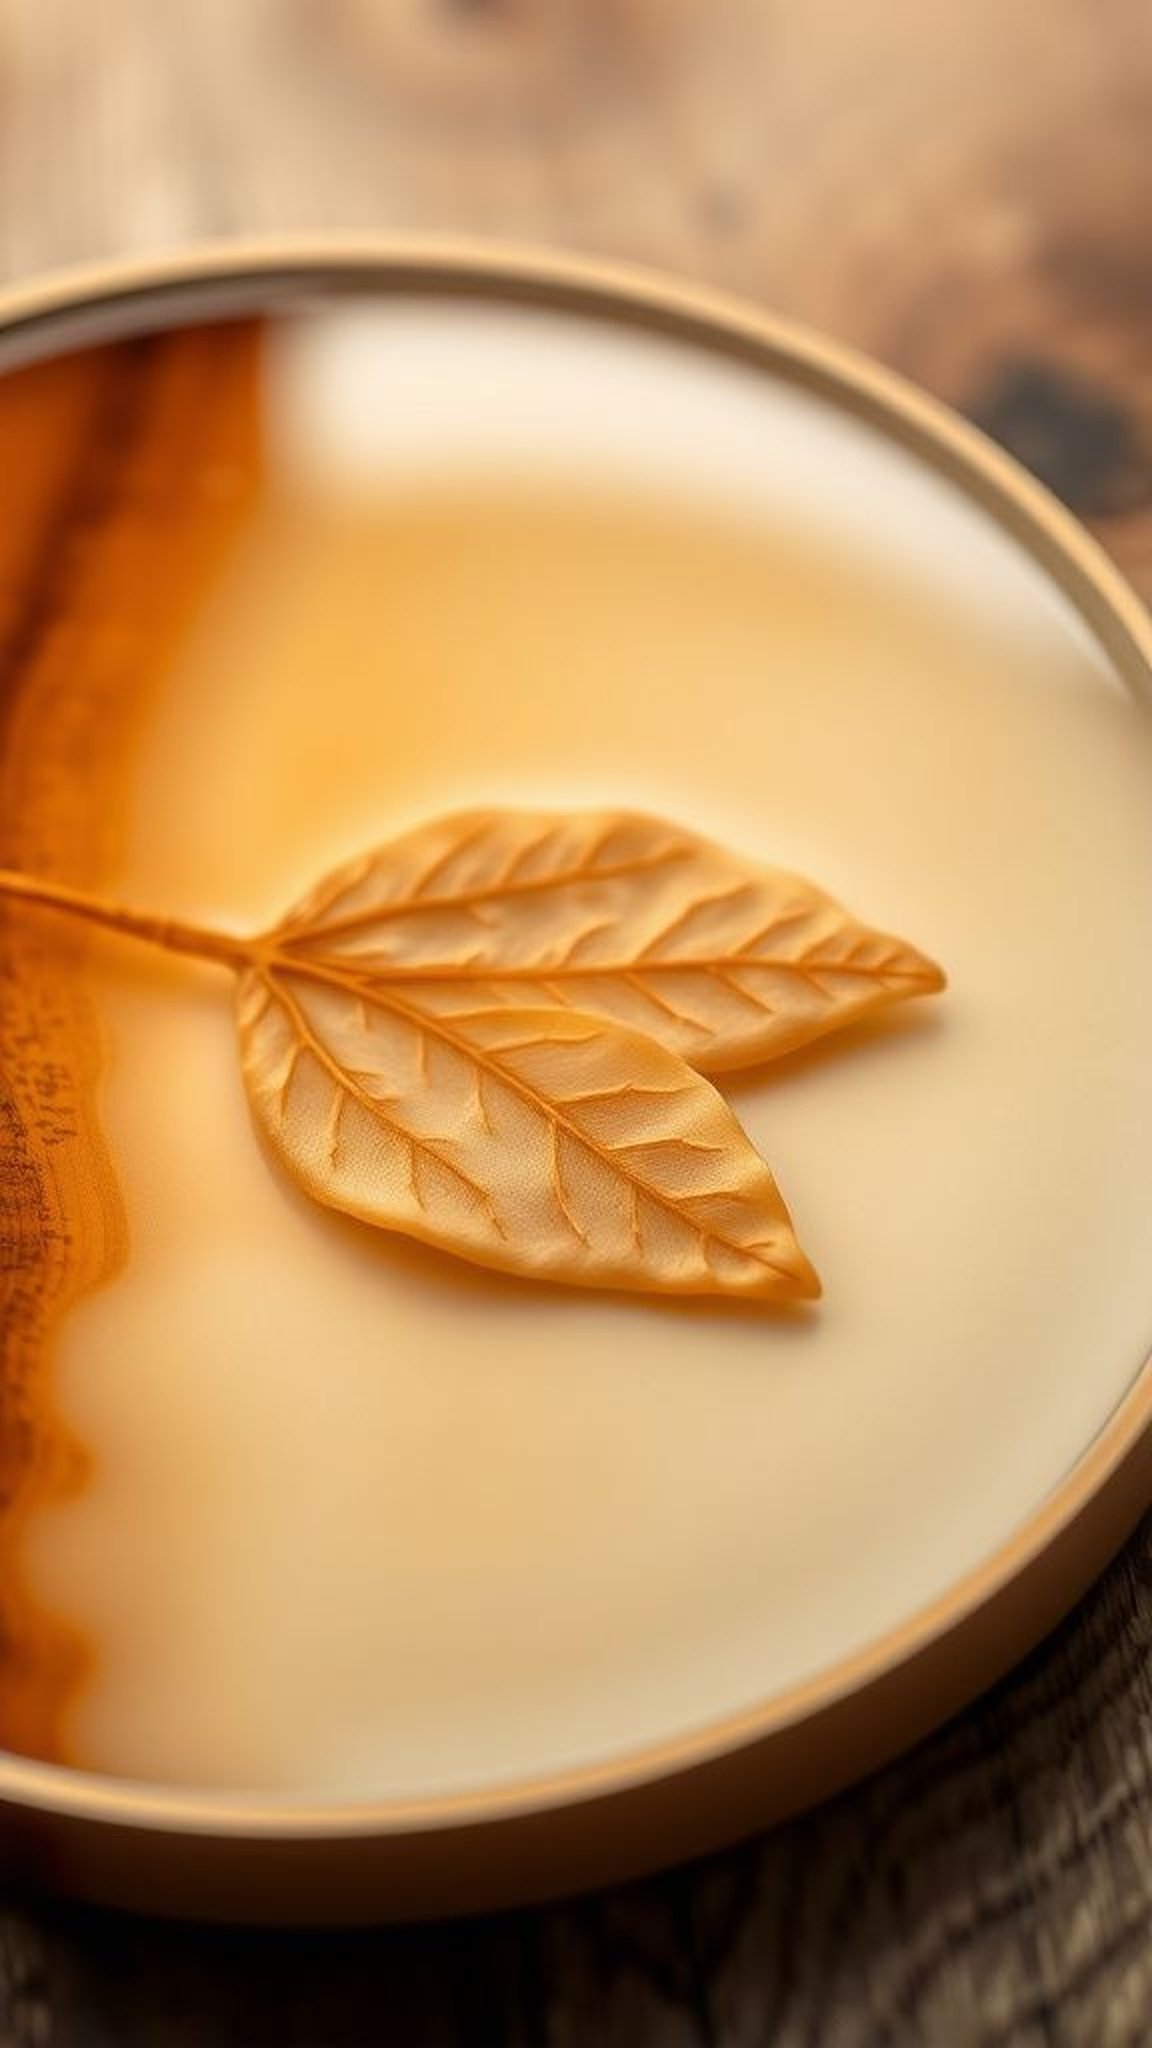
A coaster that invites close inspection, where delicate leaf veins lie trapped beneath a glossy plane and the edge has been smoothed to a soft matte. The contrast between the glossy top and sanded rim creates a tactile progression that feels pleasing in the hand.
The preserved leaf adds an organic pattern that reads like a tiny map, and the muted earth tones settle into most interiors with ease. There is a quiet satisfaction in the balance between raw natural elements and the polished sheen above them.
Steps
- Collect epoxy resin, a selection of thin dried leaves or leaf veins, round molds and sanding supplies for finishing.
- Mix resin and hardener thoroughly, then pour a thin base layer into the molds and allow it to gel slightly.
- Place leaf veins flat onto the tacky surface and cover with another clear layer of resin to encapsulate them fully.
- After curing, demold and sand edges gently with progressively finer grit until a soft, matte band appears.
Terrazzo-effect coaster set with colorful chips
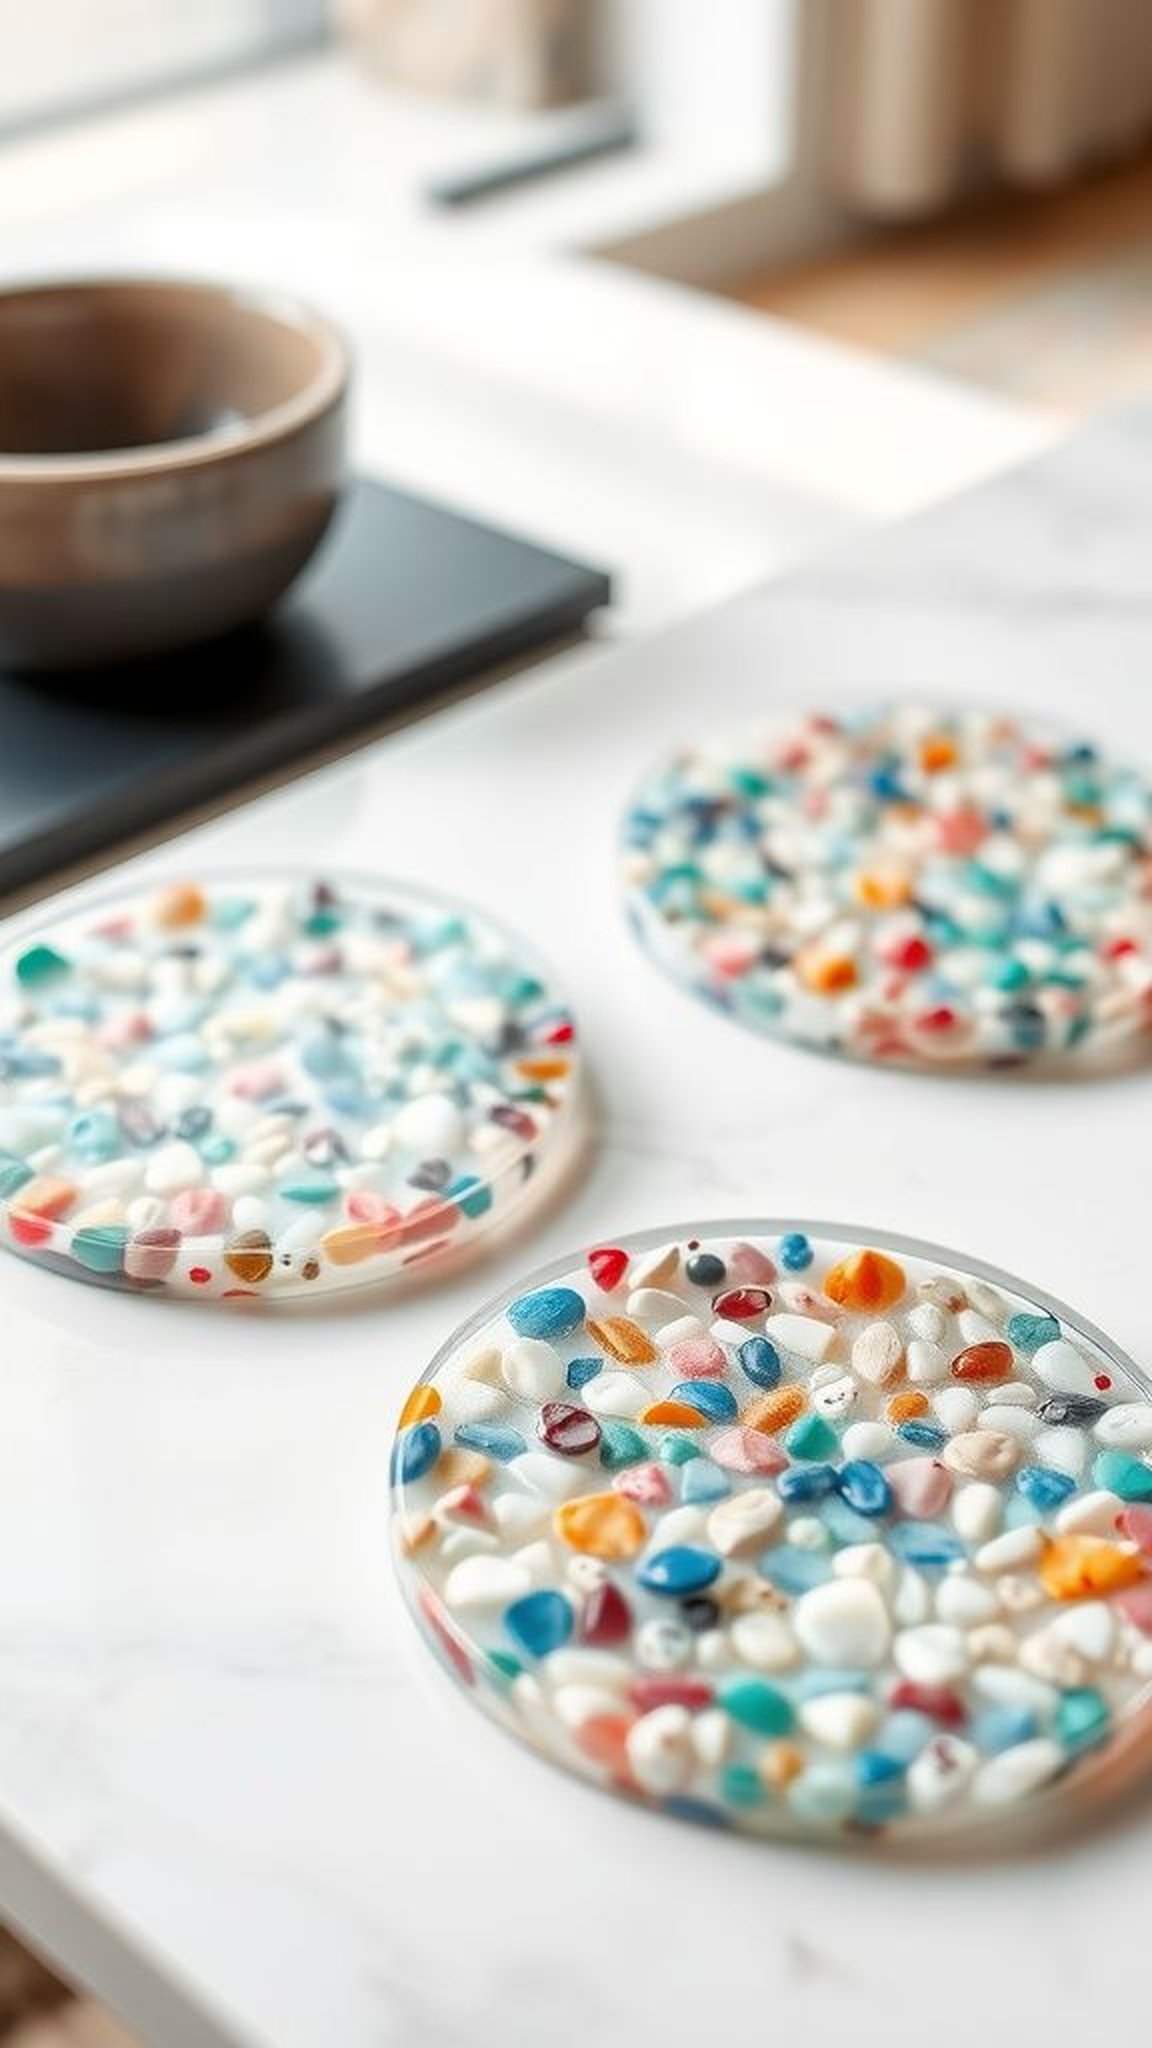
A playful cluster of coasters that mimic terrazzo, where tiny chips of color punctuate a neutral ground like confetti trapped in glass. Each shard adds a tactile hint beneath the glossy skin, and the overall effect is cheerful without being loud.
The surface responds coolly to touch and the glossy finish snaps light back with a pleasant gleam. When placed together, the set reads like coordinated confetti patterns, and they can lift a tabletop arrangement with their subtle, scattered color notes.
Steps
- Gather clear epoxy resin, multicolored chips of resin or terrazzo fragments, round silicone molds and mixing tools.
- Mix resin and hardener thoroughly until clear and consistent, then pour a thin base layer into each mold.
- Scatter the colorful chips into the resin layer until the desired terrazzo density is reached and press gently to settle.
- Cover with a final clear resin layer, remove bubbles with a torch and allow full curing before demolding.
Vintage map coaster set with translucent resin overlay

Tiny slices of time kept under glassy resin, these coasters carry snippets of old maps that peek through translucent layers. The paper textures soften under the sheen and edges of coastlines blur into gentle watercolor bands.
The finished touch gives a faint nostalgic scent memory of old paper and glue from the making process. Each coaster invites a moment of quiet curiosity, a chance to trace a coastline with a fingertip while a mug warms a thumb and the table holds a little piece of wanderlust.
Steps
- Source thin vintage map paper, clear epoxy resin, round coaster molds and necessary safety gear for working with resin.
- Mix resin and hardener thoroughly and pour a thin clear base into each mold to create a leveling layer.
- Place selected map cutouts onto the tacky surface and gently press to remove air pockets, then seal with another clear resin layer.
- Cure fully, demold and optionally buff the surface for extra gloss and softness around edges.
Minimal terrazzo tray with muted pastel chips
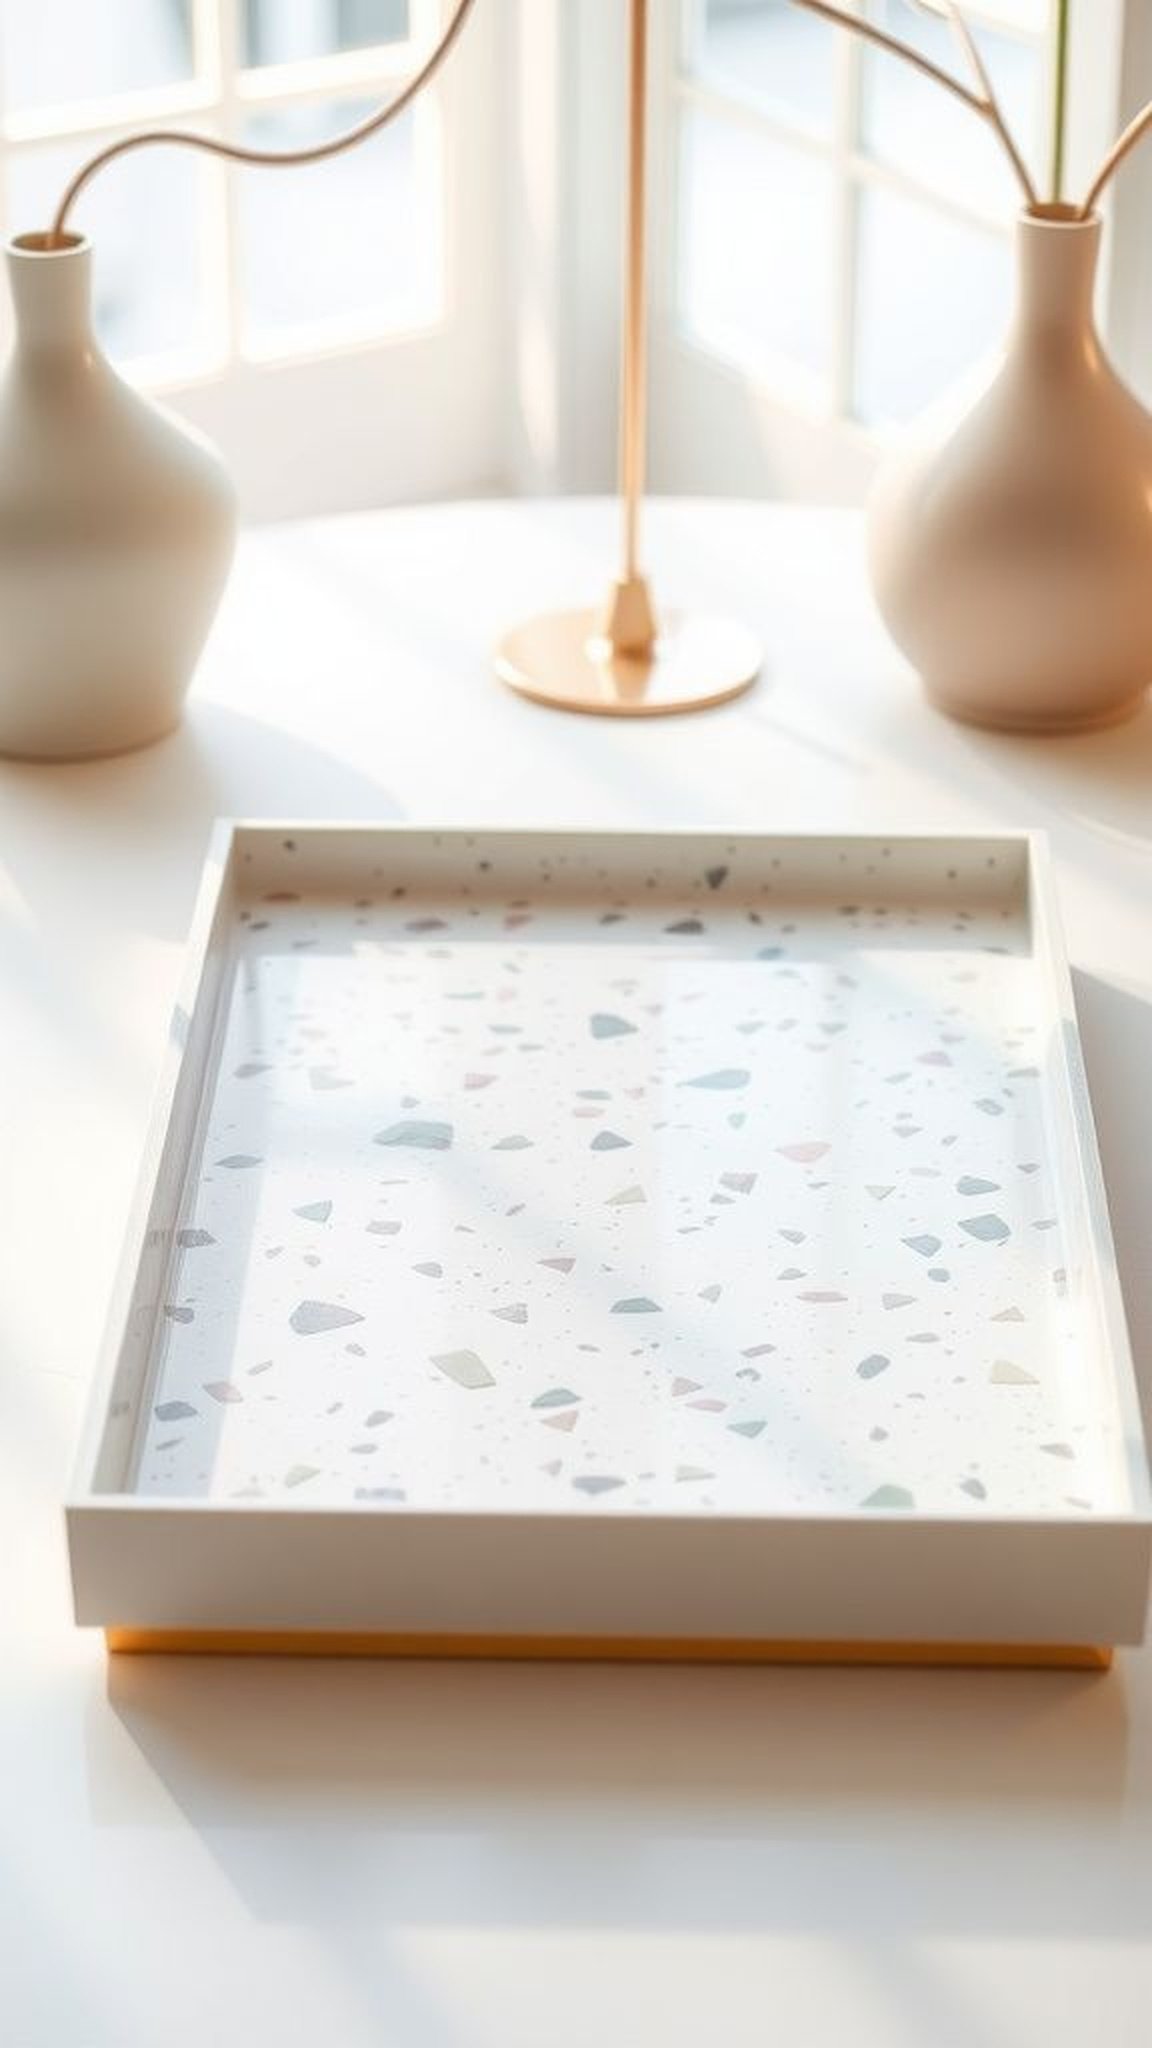
A tray that whispers rather than shouts, with soft pastel chips set into a warm neutral field. The shallow depth keeps items visible and the matte edges contrast with a glassy top plane.
The pastel palette gives a calming presence that suits morning coffee or evening tea, and the smooth surface reflects small highlights that migrate with the sun. Moving a spoon across it produces a tiny, satisfying clink, and the piece often becomes a modest centerpiece for small daily rituals.
Steps
- Collect a rectangular tray mold, clear epoxy resin, soft pastel chip fragments and tools for mixing and finishing.
- Mix resin and hardener thoroughly until clear, pour a thin base and sprinkle pastel chips gently across the surface.
- Pour a final clear layer to embed the chips fully and use a heat source to release surface bubbles.
- Allow the tray to cure completely and demold carefully, then inspect and lightly sand any sharp edges.
Citrus slice resin coasters with translucent wedges
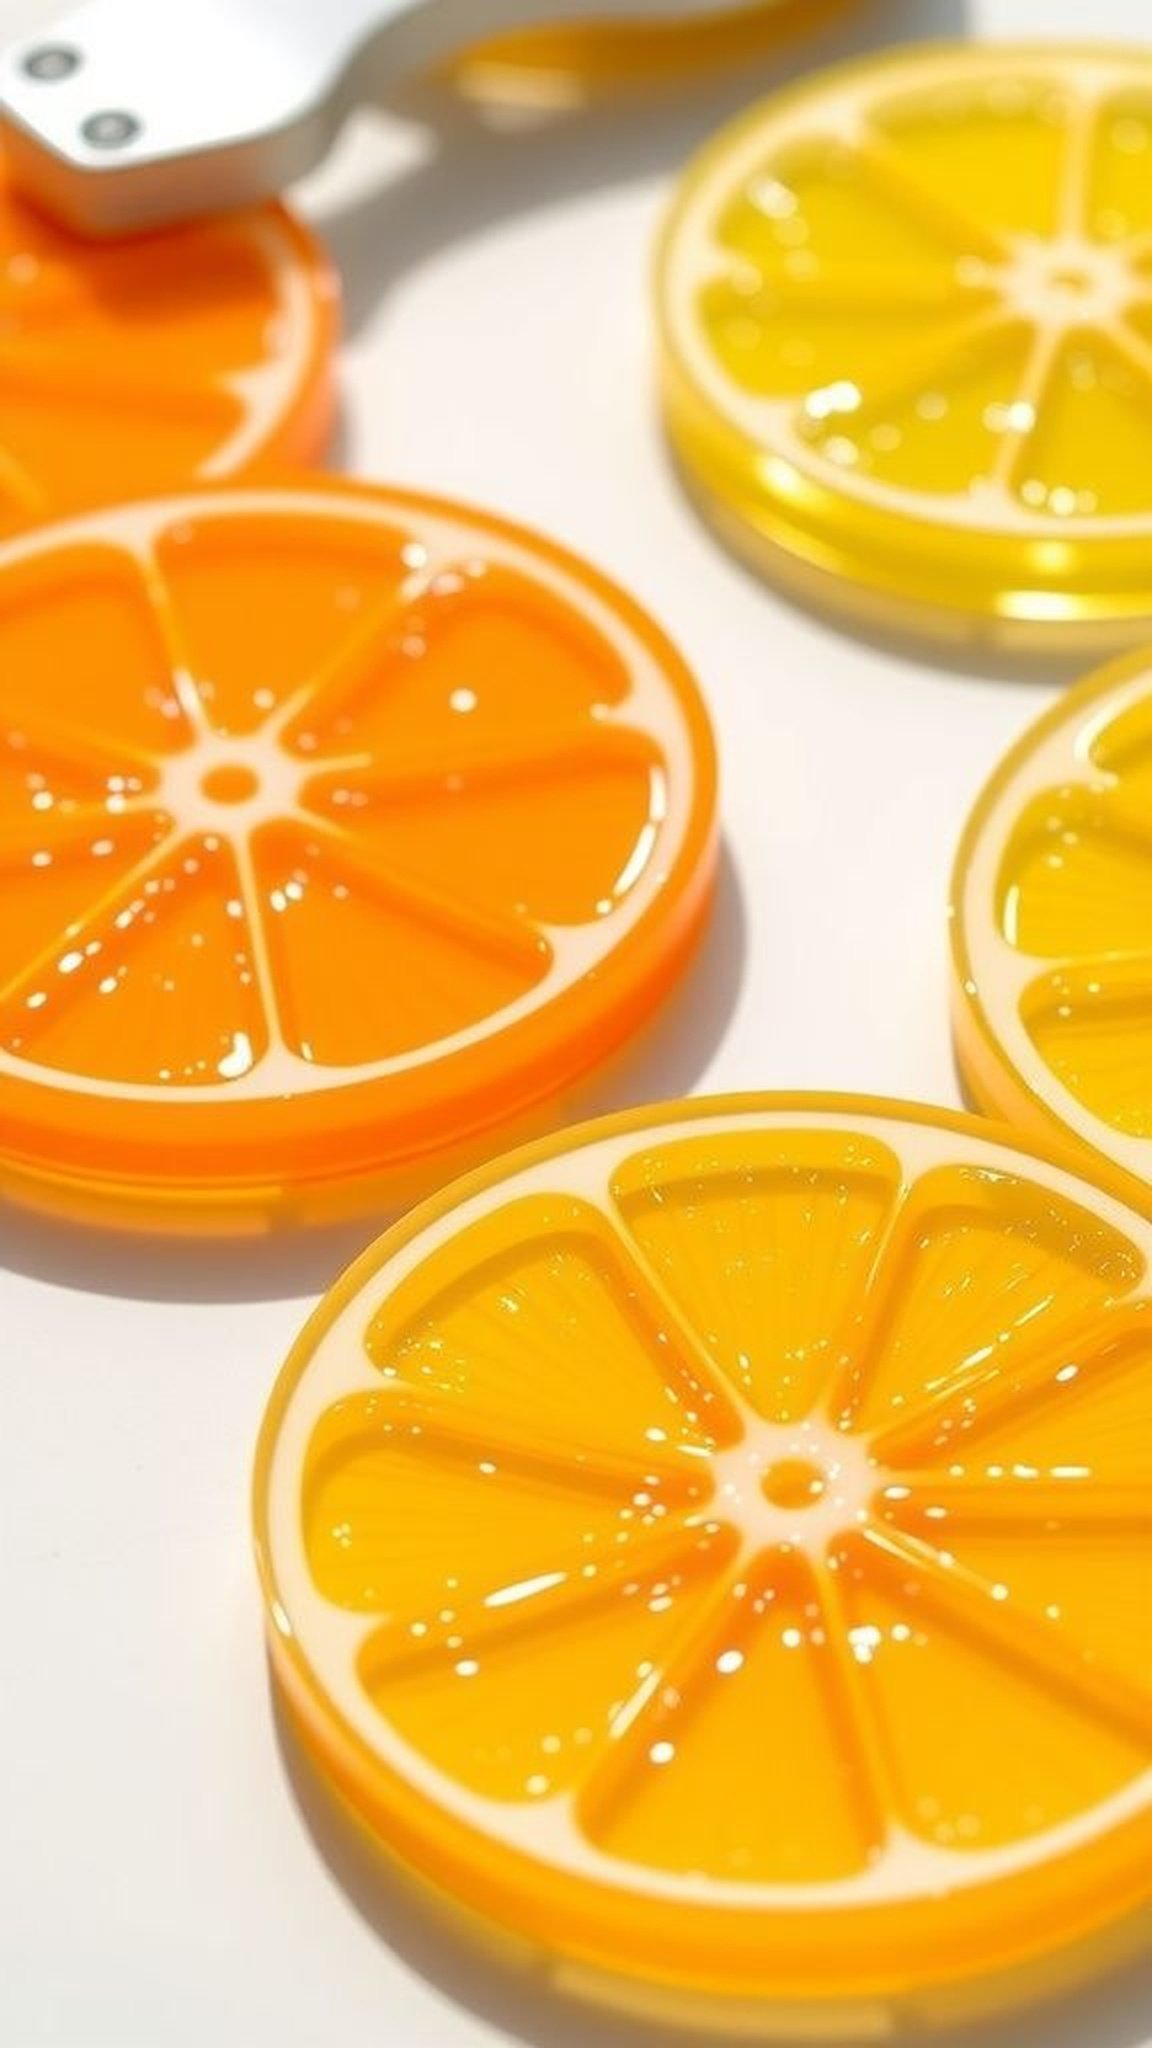
Bright and playful, these coasters capture the feeling of a freshly cut citrus fruit frozen under glass. Translucent wedges suggest zesty color and tiny air pockets catch the light like glints of juice.
The glossy top keeps the colors crisp and the underside reveals slightly diffused hues that soften edges. When a cold glass sits on one, a faint condensation ring creates a temporary conversation with the embedded fruit illusion.
The overall effect brings a small, summery cheerfulness to the table.
Steps
- Gather clear resin, citrus-colored pigments, thin silicone molds shaped for wedge detail, and standard mixing tools.
- Mix resin and hardener according to product ratios until uniform, then tint small portions with varying citrus shades.
- Build the wedge pattern by pouring tinted resin in concentric slices, allowing slight blending at the boundaries.
- Remove bubbles carefully and leave the coasters to cure undisturbed until fully hardened.
Iridescent pearlescent tray with subtle shimmer
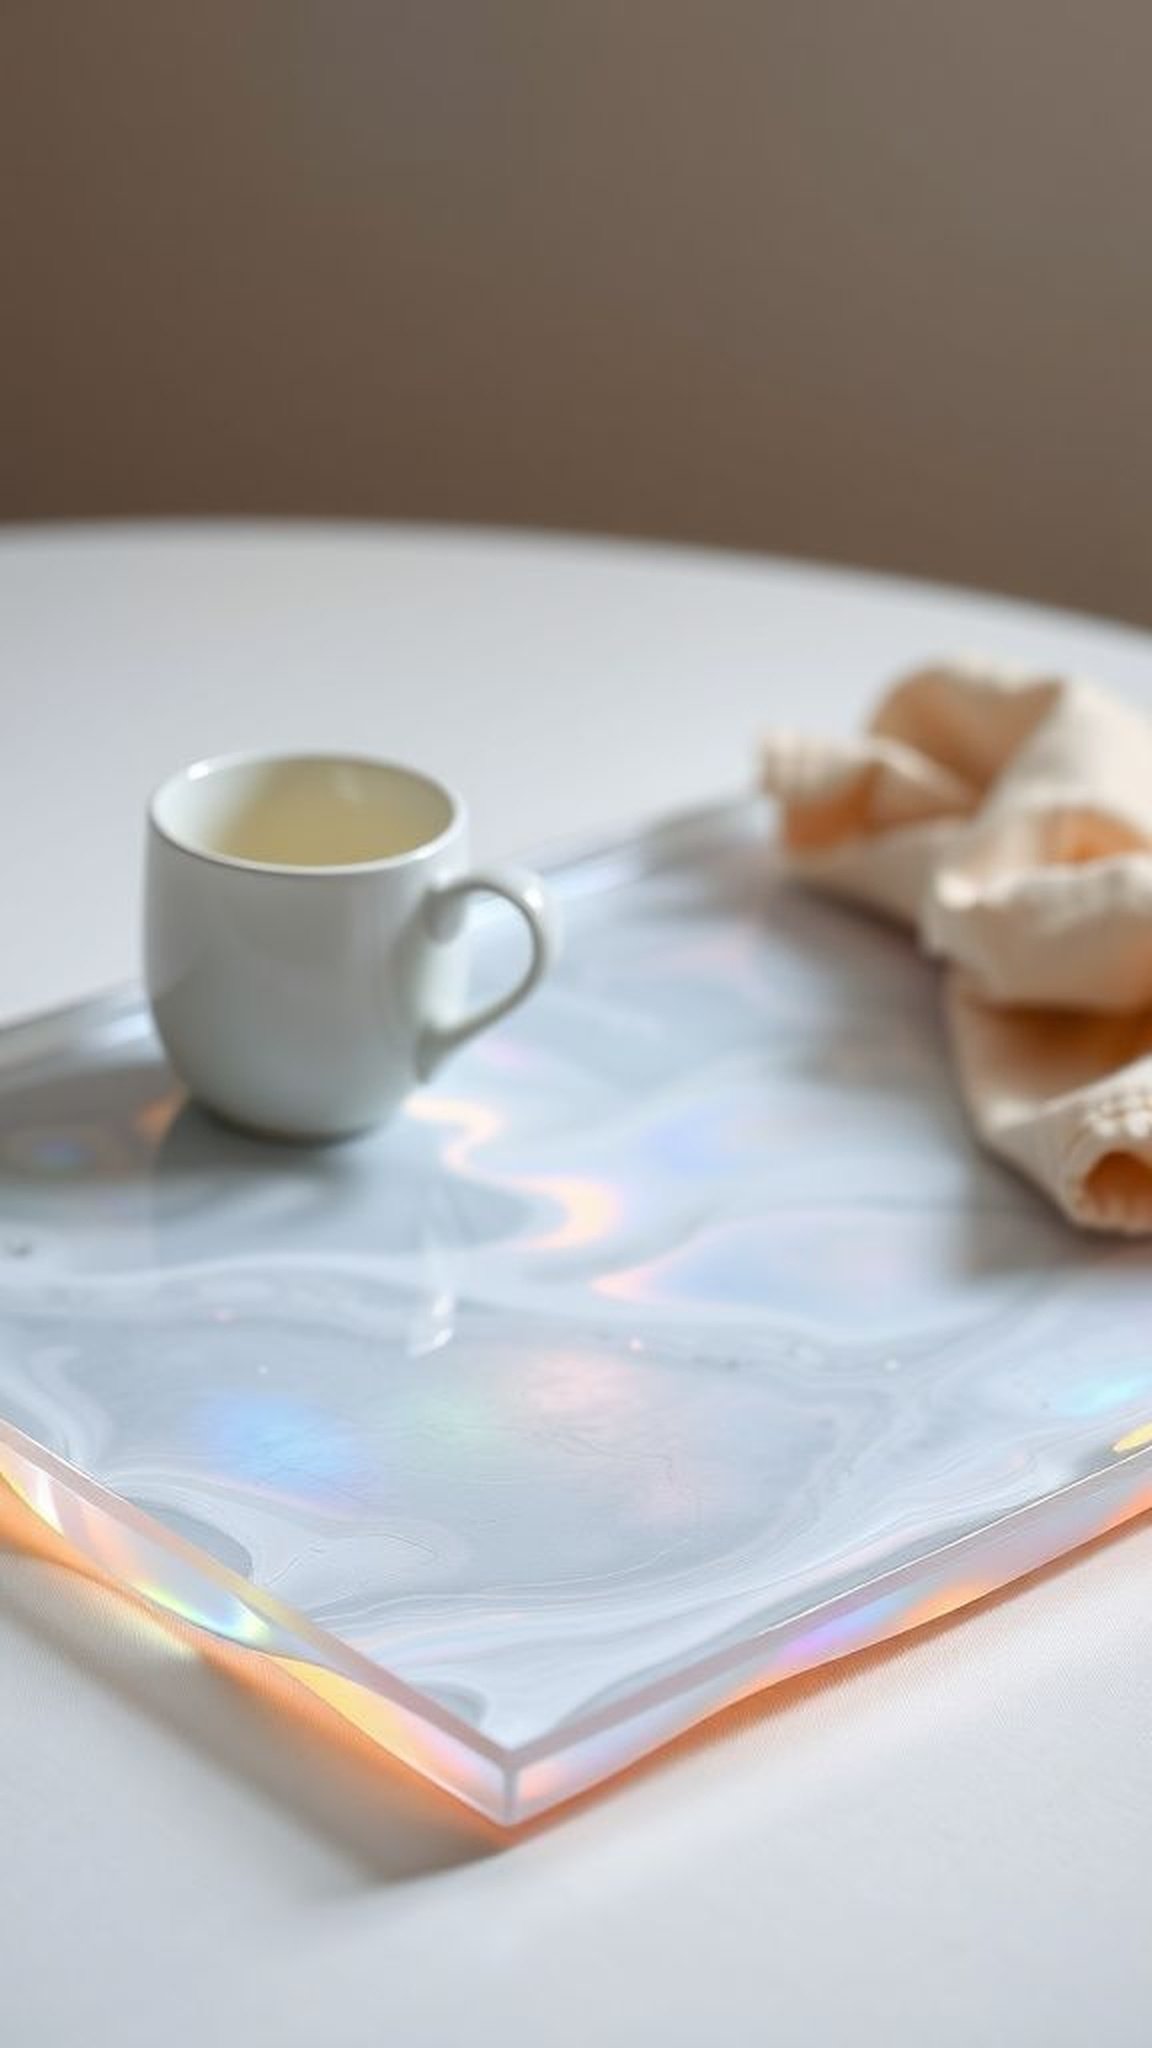
A tray that seems to shift color with every tilt, faint pearlescent pigments beneath the surface create a soft sheen that catches light like mother-of-pearl. The finish is smooth and reflective, while the shimmer remains understated rather than flashy.
Placing small items on it creates miniature reflections that dance gently, lending an elegant air to ordinary objects. The piece pairs well with ceramics and linen, and the gentle opalescence brings a quiet luxury that feels calm rather than showy.
Steps
- Assemble a tray mold, epoxy resin, pearlescent mica powders in soft hues and mixing equipment in a dust-free area.
- Mix resin and hardener carefully until clear, then fold mica powders into the mixture until evenly suspended.
- Pour the pearlescent resin into the tray mold and allow the pigments to settle into natural waves for a subtle shift effect.
- Use a torch to remove surface bubbles and cure the tray fully before demolding and gentle polishing.
Botanical slice coaster set with tiny seed pods
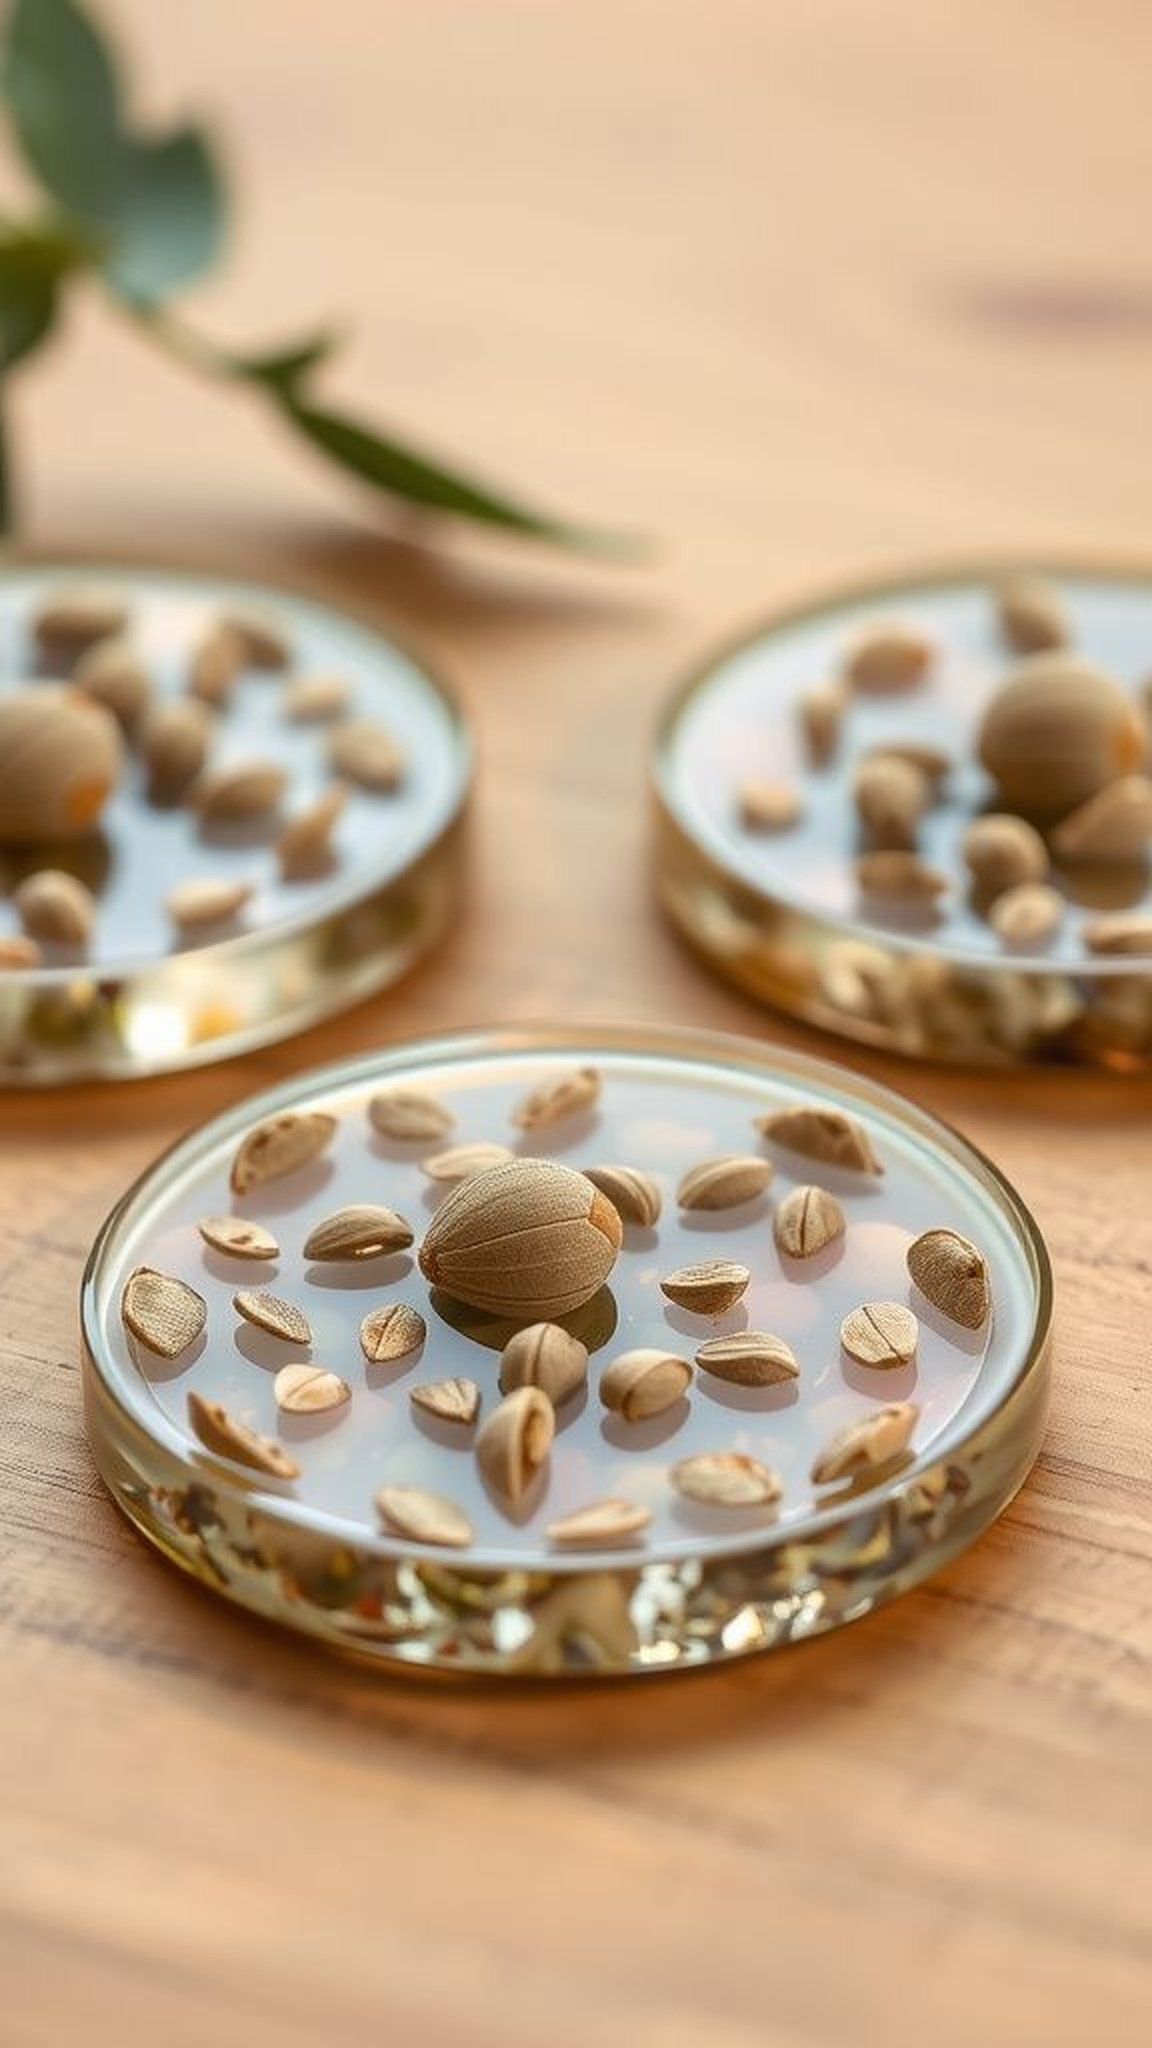
A small collection that holds botanical curiosity, each coaster encases a scatter of seed pods and tiny stems under crystalline resin. The textures of pods peek through opaque and translucent layers creating a micro landscape.
The surface invites touch while the preserved seeds seem to promise a quiet story of growth and change. These pieces often spark conversations about foraging or yard finds and carry an earthy quiet that pairs well with wooden tables and hand-thrown pottery cups.
Steps
- Collect assorted tiny seed pods, clear epoxy resin, circular molds, gloves and mixing tools for a tidy workspace.
- Mix resin and hardener thoroughly, pour a thin base layer, and allow it to tack slightly before placing the botanical elements.
- Arrange seed pods gently on the tacky surface, then pour a final clear layer to encapsulate them fully.
- Cure undisturbed until hard, demold and buff the surface if desired for extra shine.
Stained glass effect coaster with jewel tones

These coasters mimic tiny stained glass panels, where jewel-toned pockets of color sit framed by clear resin seams. Light passes through the saturated sections and casts colored reflections on the table below, creating a small luminous landscape.
The surface remains smooth and cool and the brightness of each jewel tone adds a cheerful pop to tabletop arrangements. Handling one feels slightly ceremonial, like holding a fragment of a window, and the vivid colors add instant character without overwhelming a space.
Steps
- Prepare clear epoxy resin, concentrated transparent pigments in jewel tones, silicone molds with segmented patterns and mixing supplies.
- Mix resin and hardener completely until transparent and consistent, then tint small portions heavily for saturated color pockets.
- Fill segmented areas in the molds with different tinted resin portions to create a stained glass mosaic effect.
- Inspect for bubbles, remove with a gentle flame and allow full curing before removing from molds.
Minimal concrete-look resin coasters with matte rim
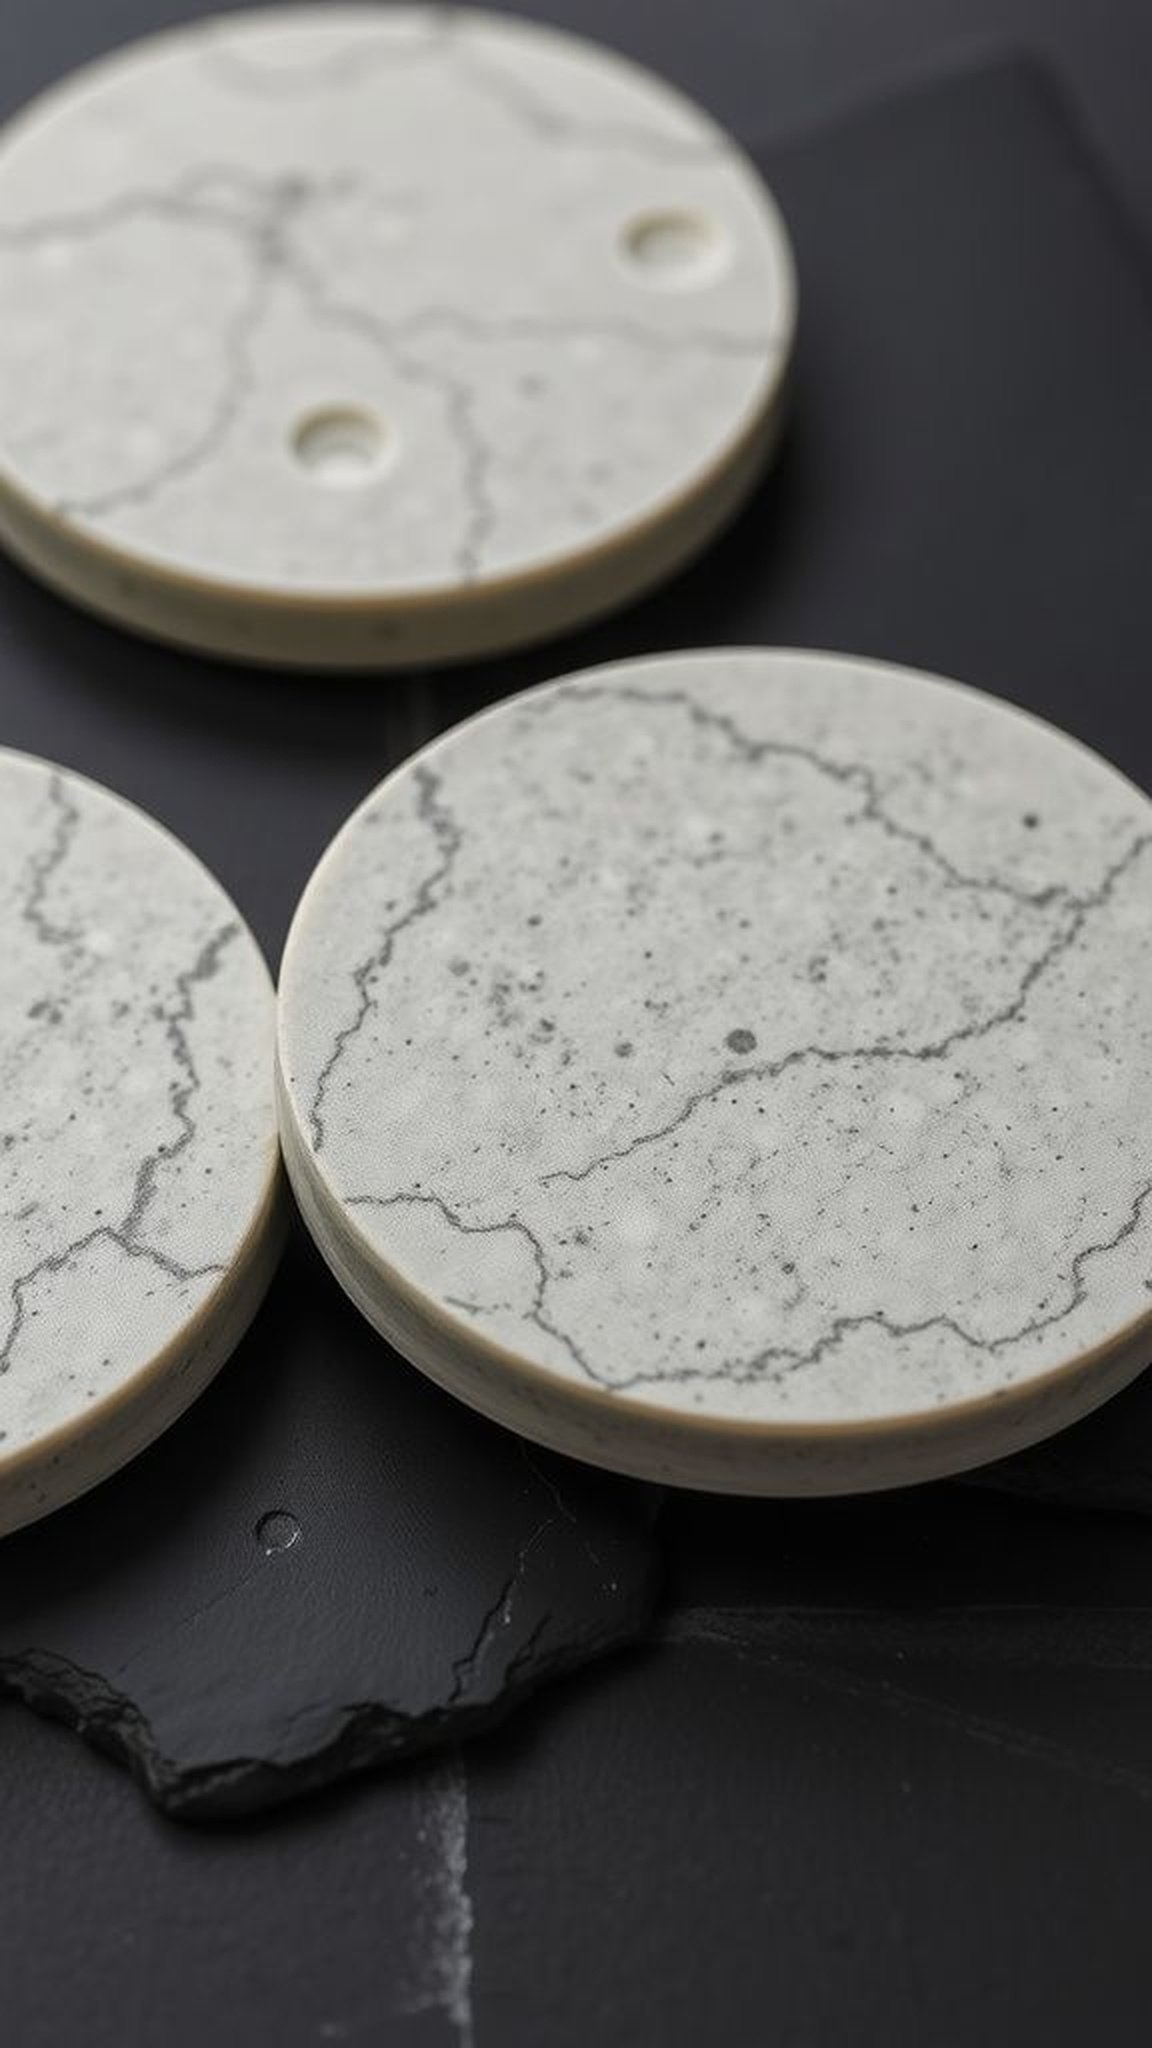
A set that brings industrial calm to the tabletop, the central field mimics raw concrete under a clear gloss while the rim has a contrasting matte finish. The tactile difference between glossy center and soft outer band is pleasing under fingertips.
The neutral tones make them adaptable to both modern and rustic settings and their low-key appearance often surprises guests who expect heavier materials. The weight feels reassuring and the cool surface pairs nicely with a warm mug for a balanced sensory contrast.
Steps
- Gather epoxy resin, concrete-effect pigment powder, circular molds and finishing tools for achieving matte and glossy contrasts.
- Mix resin and hardener thoroughly, then blend in concrete pigment for the central area while leaving rim material separate for matte finishing.
- Pour the concrete-tinted resin into molds for the center and apply a different finishing compound or sanding technique to create a matte rim.
- Allow curing to complete fully, demold and perform any final sanding or buffing to refine the matte band.
Crystal shard tray with embedded metallic accents

A tray that feels jewel-like, with shards and metallic accents suspended beneath a glassy top. The metallics catch light and emit warm flashes while crystal fragments add dimensional sparkle.
The overall surface remains smooth and reflective, but the internal complexity gives the sense of holding a miniature treasure field. Carrying it evokes the faint weight of something precious, and it sits well among neutral linens or darker wooden backgrounds where its shimmer can stand out without dominating the setting.
Steps
- Collect a tray mold, clear epoxy resin, metallic leaf flakes, crystal shard pieces and personal protective gear.
- Mix resin and hardener thoroughly until clear and free of streaks, then pour a thin base layer into the mold.
- Arrange crystal shards and metallic accents on the base layer, then cover with additional clear resin until encapsulated.
- Remove bubbles carefully, allow the tray to cure completely and then demold and polish the surface for shine.
Layered ombre coasters with soft color transitions
A set that reads like a gradient study, where each coaster fades gently from one hue to another beneath a glossy finish. The transitions feel soft enough to soothe the eye and the overall effect is quietly elegant.
The surface is cool and reflective while the colors seem to float within the depth of the resin. These coasters are particularly pleasing when arranged as a sequence across a table, creating a gentle visual rhythm that can complement both bright and neutral interiors without competing for attention.
Steps
- Prepare epoxy resin, a palette of related pigments for the ombre effect, round molds and mixing supplies.
- Mix resin and hardener thoroughly until smooth, then tint several small portions with gradually shifting pigment intensities.
- Pour the darkest tint first and layer progressively lighter tints in smooth transitions to create the ombre look.
- Eliminate surface bubbles and let the coasters cure completely before handling or stacking.
Minimal black and white terrazzo coaster pair
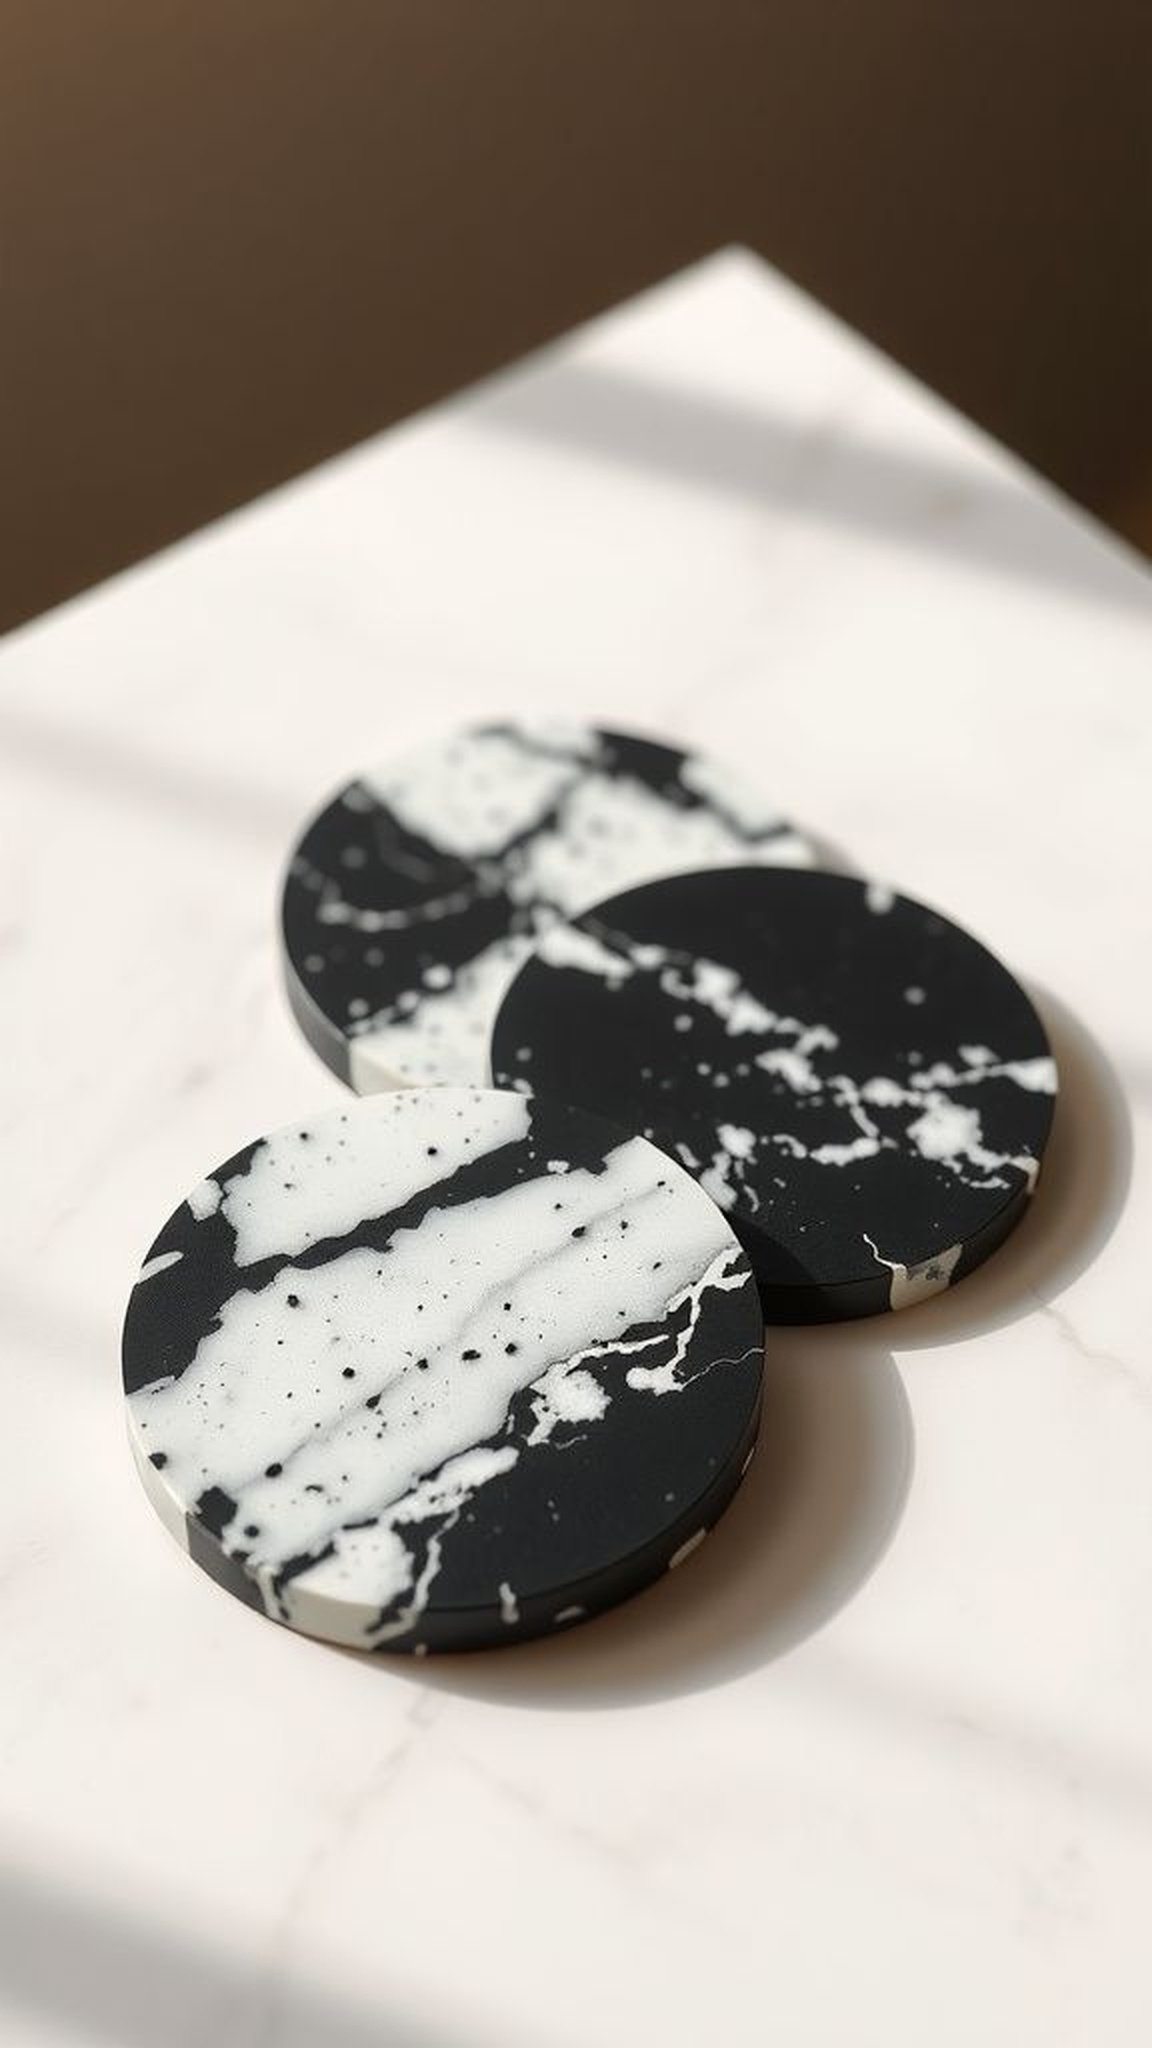
A graphic pair that favors contrast, light chips scattered across a deep dark field balance with the crispness of pale fragments. The glossy top keeps the pattern readable while the tiny chips add texture beneath the surface.
The coasters bring a modern edge to a coffee table and their monochrome palette plays well with ceramics, books and metallic accents. Handling them provides a small sensory pleasure in the coolness of the surface and the visible layering that hints at careful composition.
Steps
- Gather black and white terrazzo fragments, clear epoxy resin, round molds and mixing tools for a clean workspace.
- Mix resin and hardener until fully combined and pour a base layer into each mold to level the surface.
- Distribute the black and white chip fragments across the resin base, pressing gently to settle them, then pour a clear top layer to encapsulate.
- Allow complete curing and demold when hardened, then inspect edges and sand lightly if needed.
Resin coaster with embedded tiny watch gears

A tiny horological world captured under clear resin, small watch gears and cogs lie in delicate arrangement, their metallic sheen softly reflected by the glossy surface. The pieces evoke curiosity about time and mechanics without feeling heavy, and the contrast between cold metal and the smooth resin plane is intriguing.
Fingers run across the surface and find only smoothness, but the inner complexity keeps drawing the eye back. Placed on a desk, such a coaster seems to invite a pause and a moment of quiet consideration.
Steps
- Source small watch gears and metallic components, clear epoxy resin, round molds and gloves for safe handling.
- Mix resin and hardener thoroughly until clear and uniform, pour a thin base layer into each mold to secure placement.
- Arrange gears on the tacky layer and cover with additional clear resin to fully encase the tiny parts.
- Cure completely, demold and optionally buff the surface to enhance shine and clarity.
Pearlized shell tray with soft coastal palette
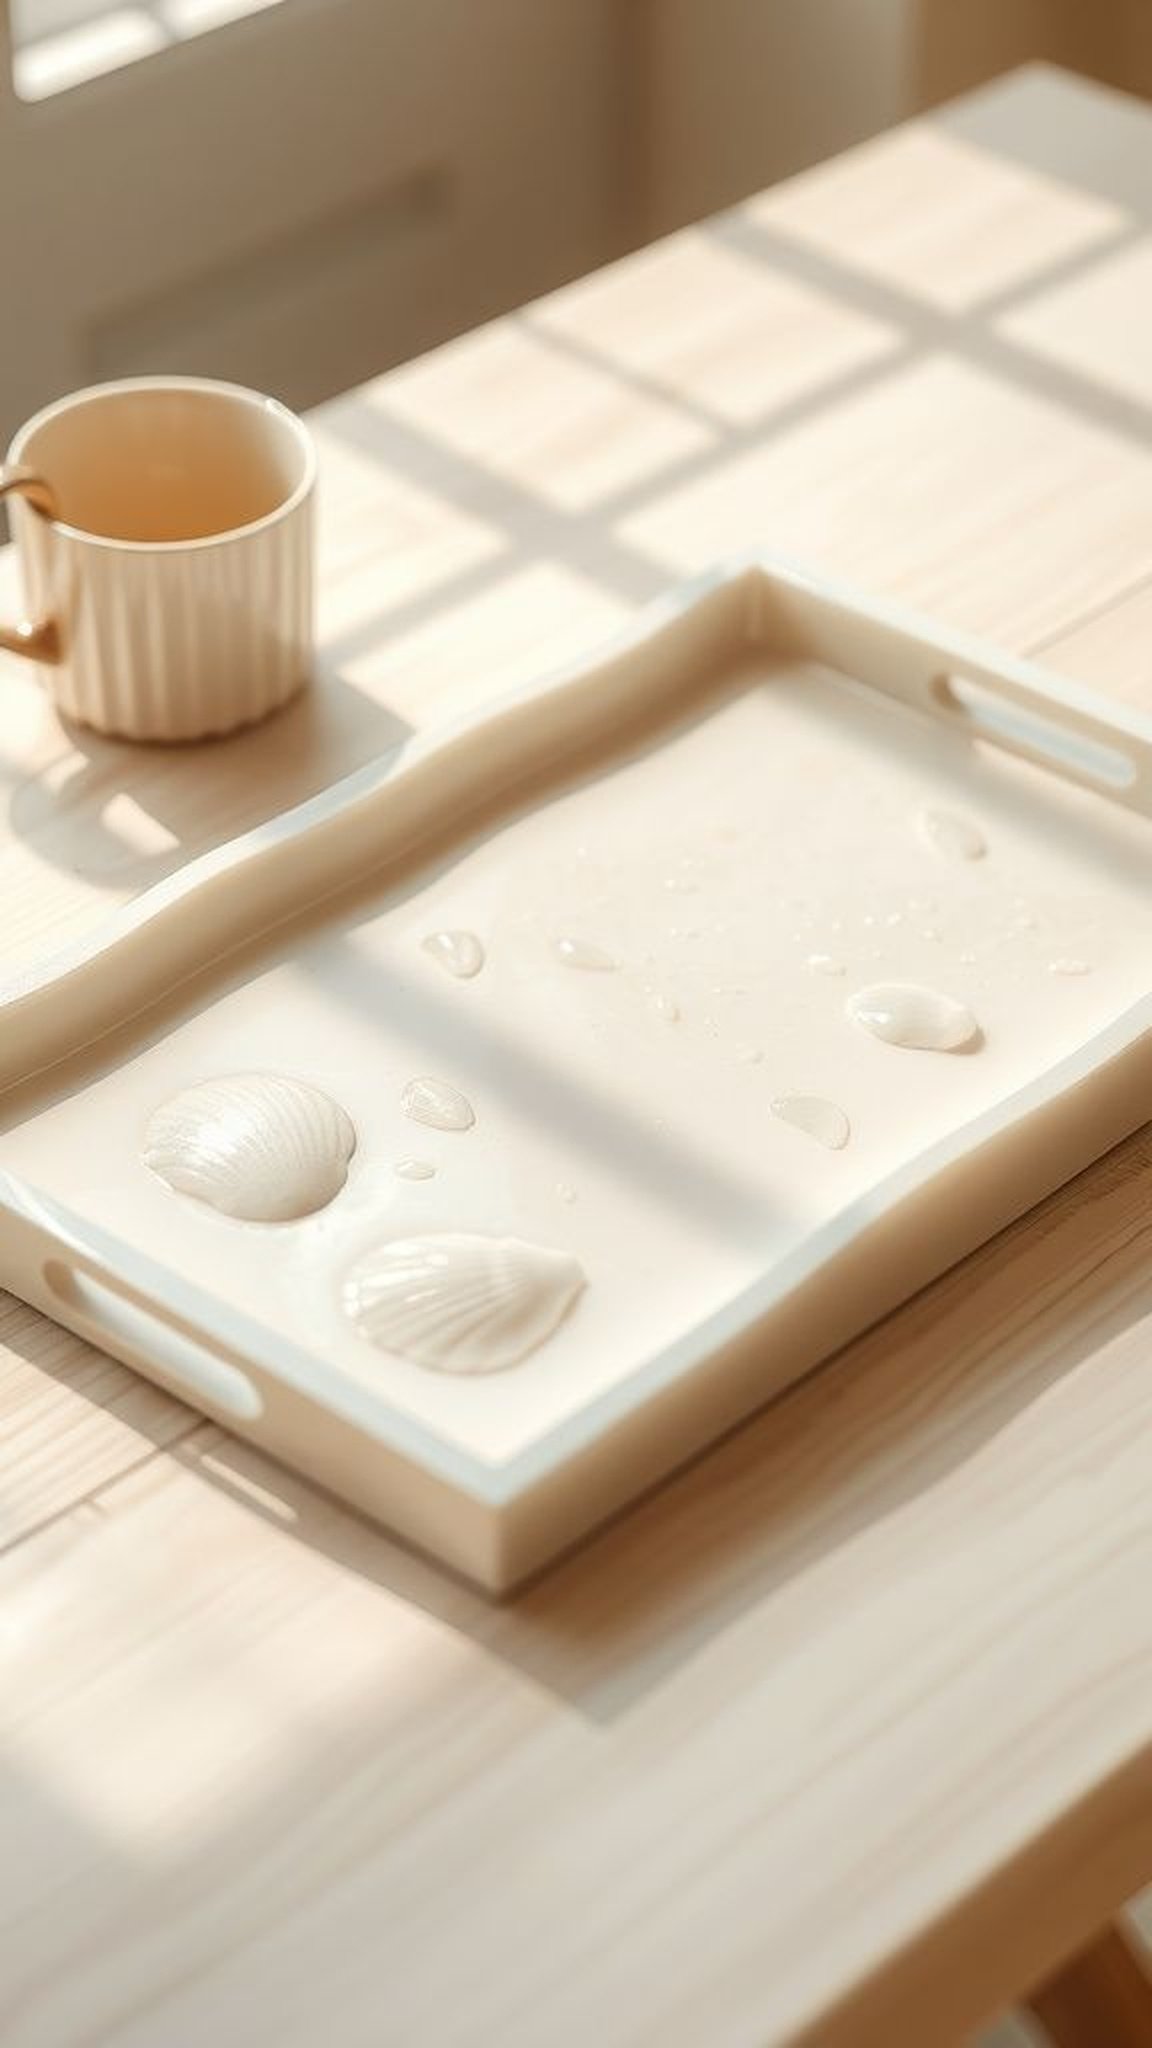
A tray that carries coastal hints without overt seaside kitsch, pearlized pigments provide a soft shimmer in sand and shell tones. The glossy finish reads like wet sand, and the gentle iridescence shifts as it catches daylight.
The piece feels light enough for serving but sturdy in the hand, and it complements ceramics with cool blues or warm creams. There is a comforting neutrality to it that allows small objects to appear curated, and the surface reflections add an understated elegance to casual moments.
Steps
- Prepare a rectangular tray mold, epoxy resin, pearlized mica powders in coastal hues and mixing supplies.
- Mix resin and hardener thoroughly until clear, then blend mica powders into the mixture for a soft pearlescent effect.
- Pour the pearlized resin into the tray mold, allowing subtle waves in the pigments for natural variation.
- Remove bubbles and let the tray cure undisturbed until fully hardened before demolding and finishing.