Handmade accents can transform a backyard or living room into a bright, joyful moment with DIY Graduation Party Decor Crafts that feel warm and personal. Small crafted details bring color, texture, and a playful rhythm across tabletops and doorways at graduation gatherings.
I once watched a string of paper tassels catch the late sun while friends chatted, and that soft movement set a relaxed mood.
That memory nudged a dozen simple ideas for DIY Graduation Party Decor Crafts that turned an ordinary porch into a favorite spot for photos and laughter.
Colorful tassel garland in school colors

A long tassel garland draped across a porch created a welcoming arc that morning. The tissue paper rustled softly when a breeze wandered through, and metallic accents flashed like tiny confetti.
Seeing identical colors repeated along the span gave the area a cohesive pulse, and guests kept pointing to little details they loved. The texture of layered paper felt fragile and breezy, and the overall effect read as playful yet composed.
It became the first little thing people noticed when arriving, which made the entrance feel cheerful and deliberate.
Steps
- Snip multiple sheets of tissue paper into long strips of even length.
- Stack a handful, wrap them tightly around a thin dowel or pencil, and snip fringe along the exposed edges.
- Slide the fringed bundle away from the core, gather the top, thread a string through, and repeat until the desired garland length appears.
Photo collage backdrop for memorable pictures

A collage wall made a magnet for hugs and flashbulbs throughout the party. The prints had a matte finish that softened faces under string lights, and the paper corners curled slightly in the evening air.
Each photo told a short story and the arrangement felt like a scrapbook expanded into the room. People lingered longer than expected, reading captions and exchanging quick memories.
The backdrop created a rhythm as smaller groups moved in, and the mixture of candid shots and posed portraits gave the space a warm, intimate personality.
Steps
- Print a selection of candid and posed images in mixed sizes on matte paper.
- Arrange the prints on a large foam board or heavy poster, overlapping to create visual movement.
- Secure corners with removable fasteners and hang the board against a wall with string lights surrounding the edge.
Airy balloon arch that frames the cake table
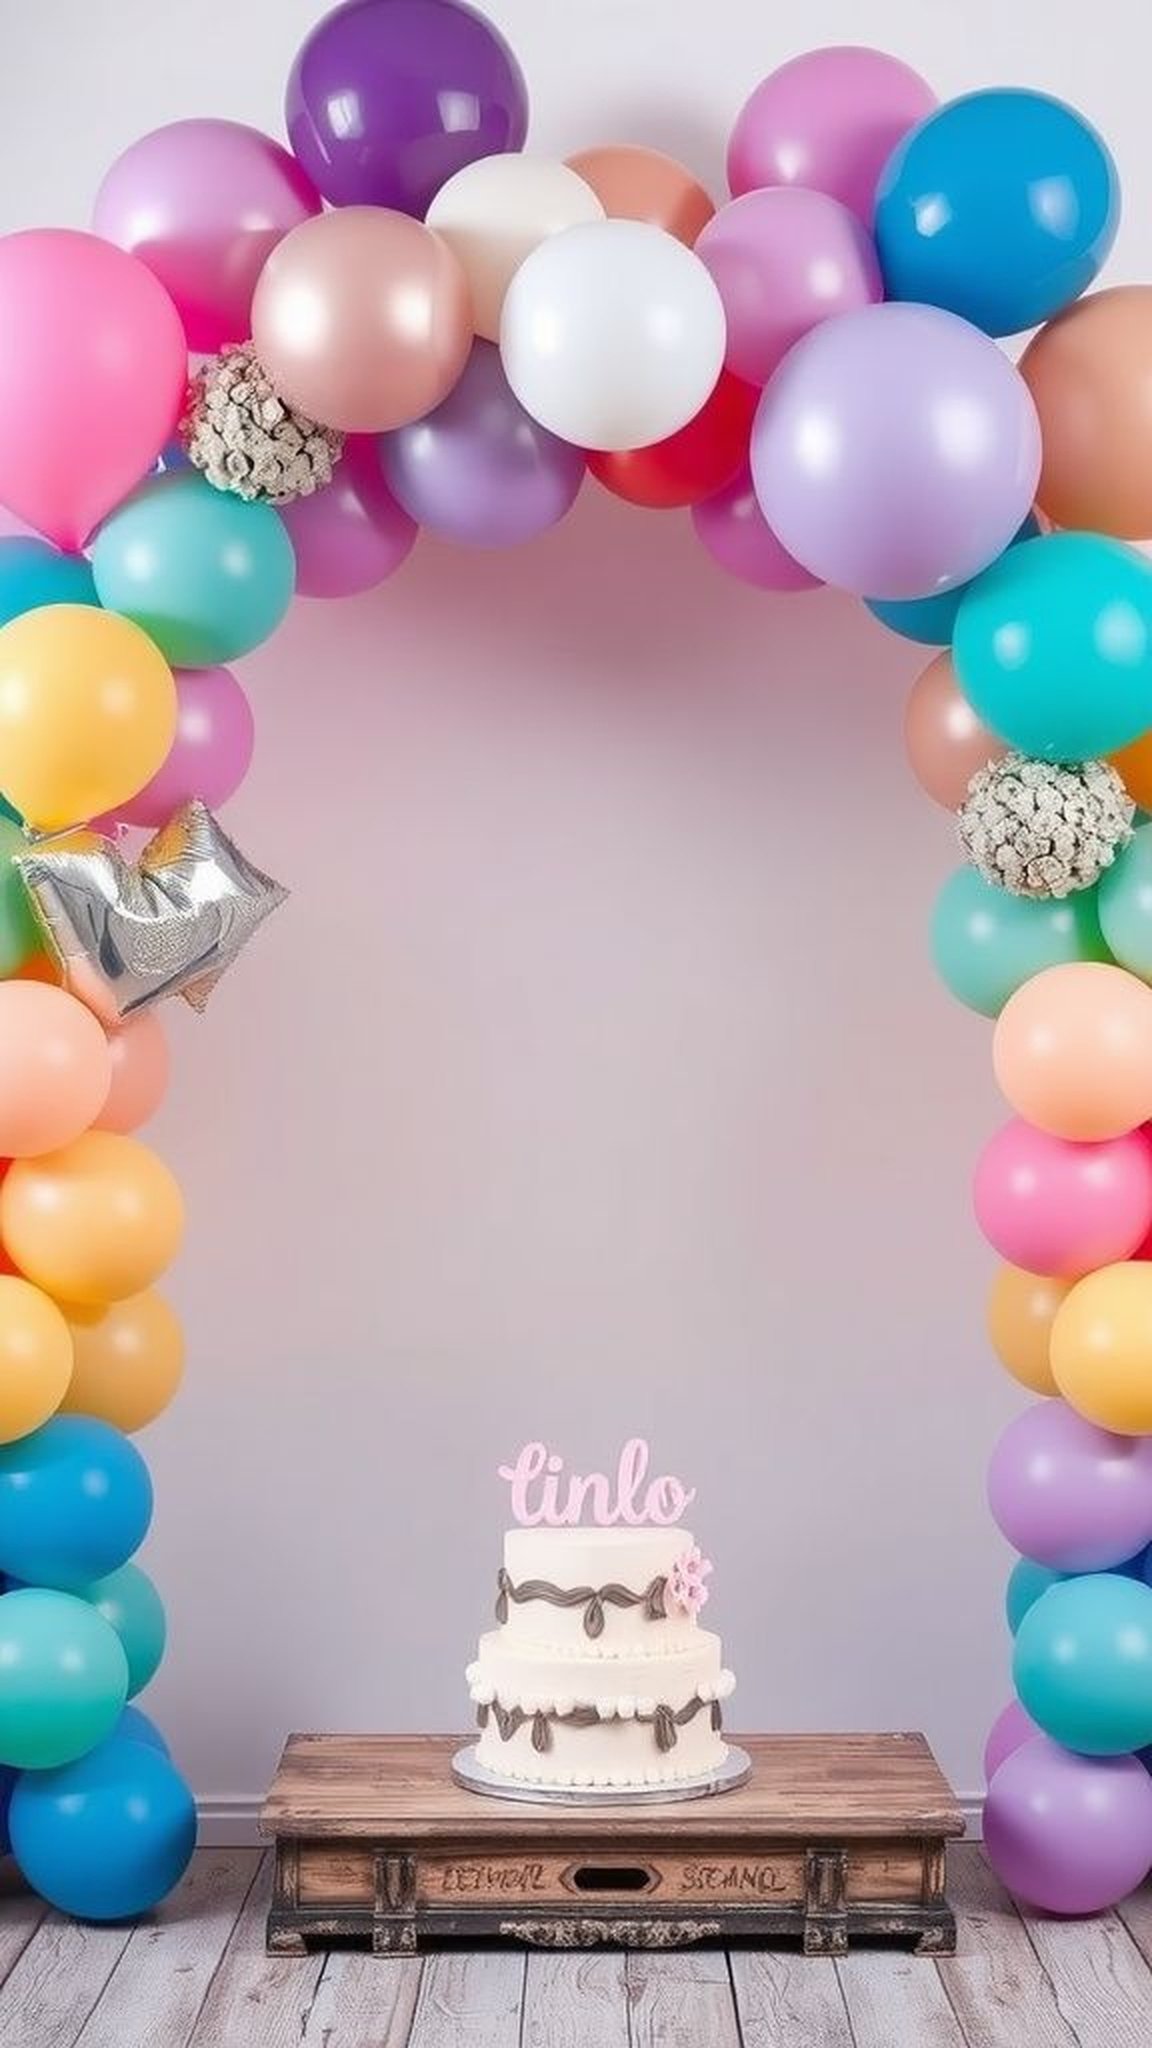
A balloon arch anchored the cake table and set a playful tone without feeling over the top. The latex had a glossy sheen catching warm light, while a few matte balloons added contrast.
A small cluster of metallic balloons reflected delicate highlights and made the display feel luxurious without being formal. The arch curved gently and provided a pleasant sense of arrival when guests approached the dessert area.
There was a satisfying pop of color when kids darted past, and the arch framed photos with an easy, celebratory energy.
Steps
- Inflate balloons in coordinating sizes and shades, keeping some slightly underinflated for texture.
- Thread balloons onto a flexible rod or string by gathering necks together and twisting to secure clusters.
- Curve the rod into an arch and anchor each end with weighted bases covered in fabric or matching balloons.
Graduation cap centerpieces with metallic details

Mini graduation cap centerpieces carried the theme to each table in a whimsical way. The black matte surface contrasted with bright tassels that caught light when candles flickered nearby.
The square silhouette felt familiar and comfortable, while a hint of gold leaf along edges added a quiet shine. Each centerpiece sat atop a textured runner and invited guests to glance down and smile.
The combination of stark black and warm metallic made the table feel thoughtfully curated and gently festive.
Steps
- Cut square panels from sturdy black cardstock and join them into a flat cap shape.
- Affix a short tassel to the center top with a small dot of double-sided tape and press gently.
- Place each cap on a low platform or book stack and pair with a small candle or greenery accent.
Paper flower wall that feels soft and romantic

A wall of oversized paper flowers translated into a soft focal point for photos and quiet conversation. Petals layered with slight variance in hue and curl offered a tactile richness when glanced at closely.
The paper had a faint tooth that caught light differently across layers, producing gentle shadows and depth. Standing back revealed a lush field of blooms, while moving closer exposed delicate creases and hand-painted edges.
The whole installation felt like a pause in motion, inviting a slow exhale and plenty of compliments from arriving guests.
Steps
- Trace petal templates onto heavyweight crepe or cardstock and snip out multiple sizes for layering.
- Soften petal edges by running them gently over a rounded tool to create natural curves.
- Layer petals around a central base, secure with stapling or strong adhesive dots, and mount the flowers onto a large backing board.
LED jar lanterns that glow along walkways

Mason jar lanterns lined the walkway and threw a warm, intimate light that felt like a private nook outdoors. The glass held tiny pinpricks of LED light that blinked calmly, and flickering reflections danced across nearby leaves.
Some jars had a frosted wash, producing a soft halo, while others were clear to show the cluster of lights inside. The tactile coolness of glass in hand contrasted with the gentle warmth the light created at night, and guests commented on how inviting the path felt when they arrived.
Steps
- Wind a cluster of battery LED fairy lights into the mouth of each clean jar, tucking the battery pack inside the base.
- Treat some jars with a diluted paint wash or adhesive glitter on the interior for diffused glow.
- Line the lit jars along the path on low stools or directly on the ground at even intervals.
Confetti-filled balloons for a playful pop

Transparent balloons sprinkled with confetti introduced a playful, kinetic element to the party. The confetti tumbled lazily within the sphere when air moved, catching light like tiny stars.
The smooth latex surface shimmered, and the colorful dots contrasted nicely against the blue sky during daytime photos. Children were mesmerized by the slow dance of shapes, and adults smiled at the lighthearted detail.
The confetti gave each balloon personality, as some had dense clusters while others revealed airy, scattered patterns that felt spontaneous and fun.
Steps
- Spoon small circles of tissue or metallic confetti into clear balloons before inflating.
- Inflate balloons to a medium size so confetti floats freely and tie each neck with matching ribbon.
- Anchor groups of confetti balloons at varying heights around seating areas for a lively visual.
Diploma scroll place cards on each setting
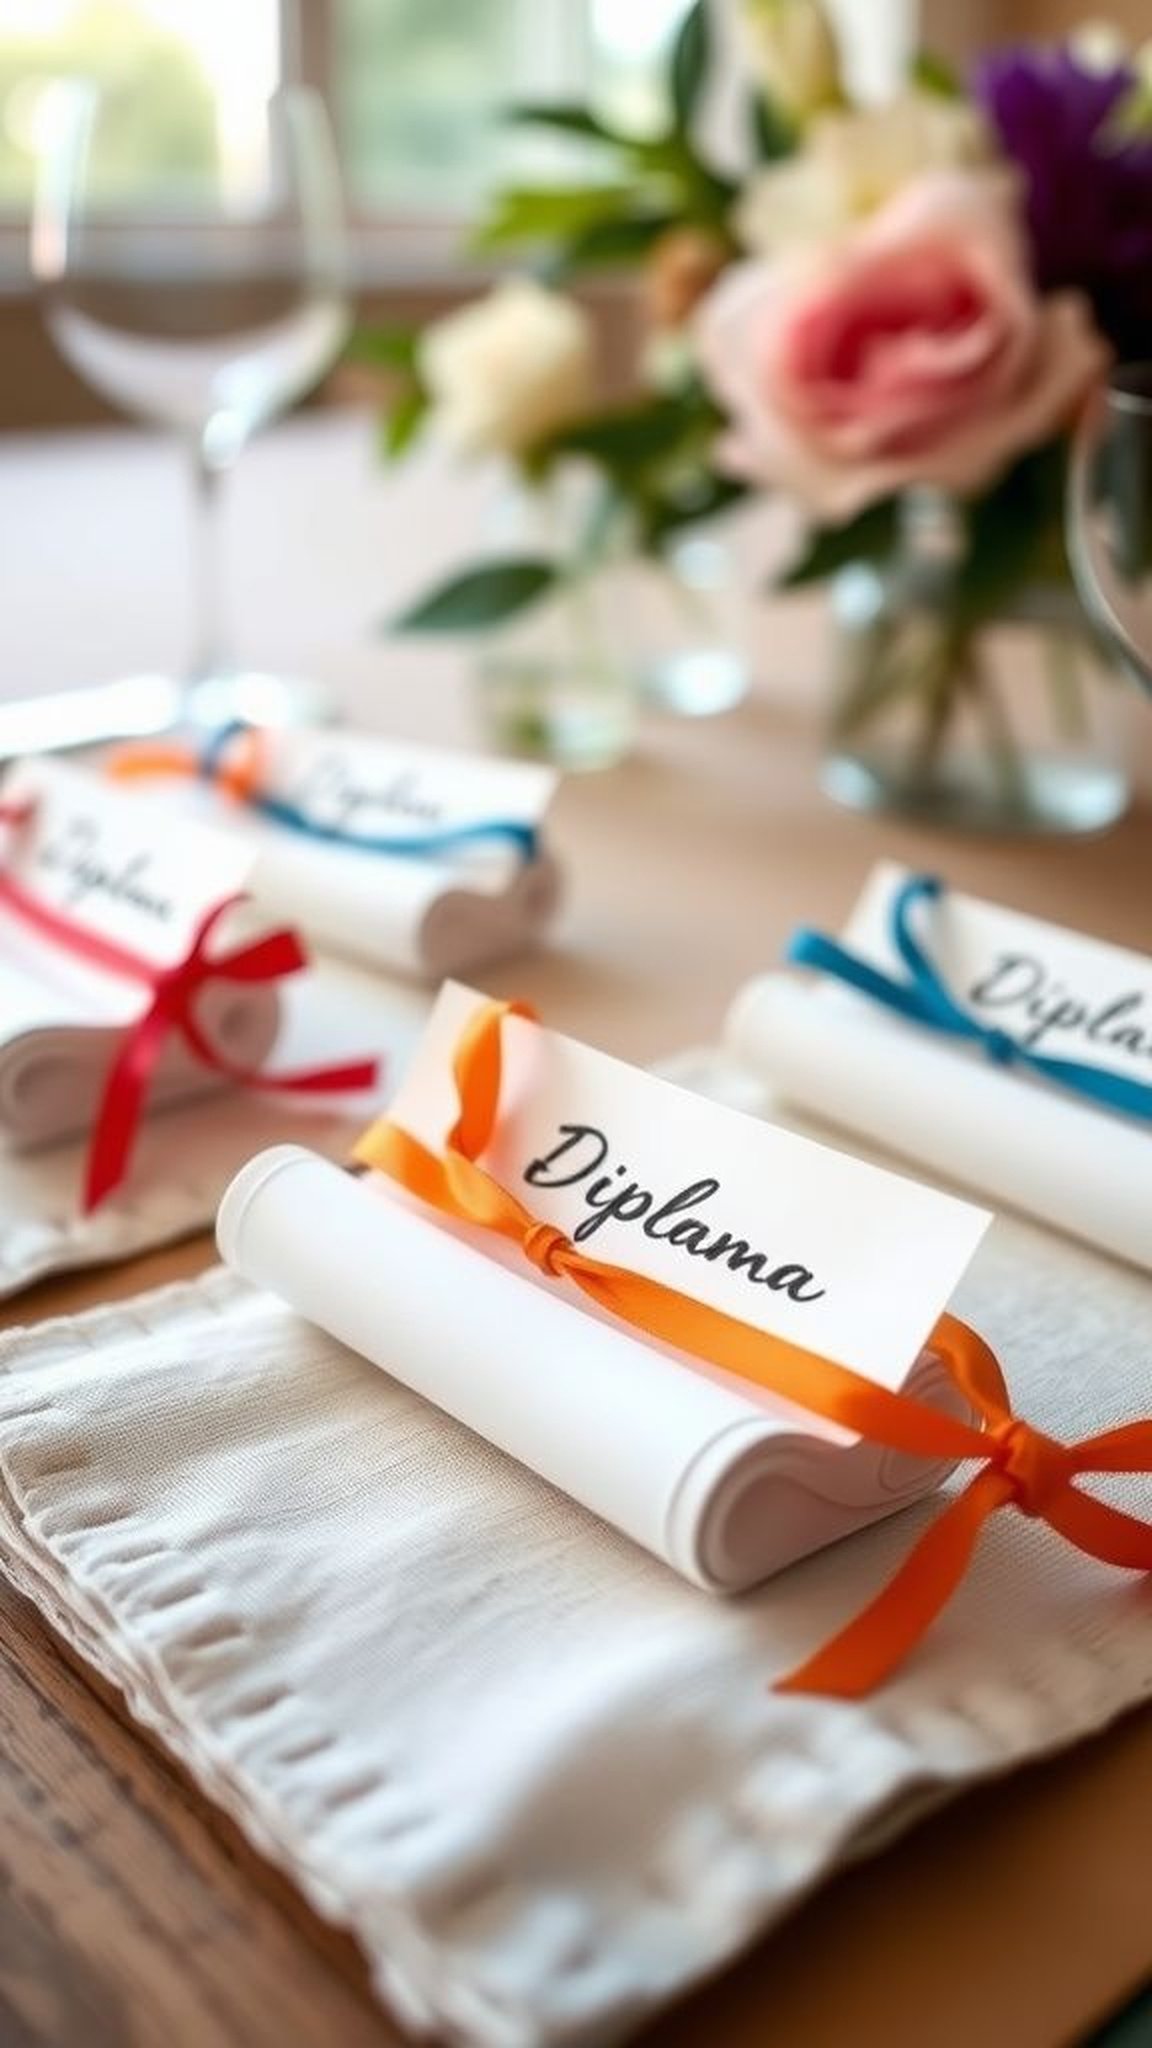
Mini diploma scrolls perched at table settings added a clever nod to graduation. The tight paper rolls had a crisp texture and the tiny ribbons gave a pleasant click when adjusted by hand.
Each scroll sat beside a napkin, and seeing a guest unfold the small note inside created a tiny moment of curiosity. The monochrome paper and bright ribbon created a neat contrast against patterned plates, and the scrolls felt like a small keepsake that echoed the larger rite of passage celebrated that day.
Steps
- Cut strips of lightweight paper and roll them into tight cylinders, leaving a bit of exposed edge.
- Secure each roll with a thin ribbon tied into a petite bow and tuck a name tag under the ribbon.
- Lay the scroll at each setting, angled slightly toward the plate so guests notice it instantly.
Chalkboard welcome sign with playful lettering

A hand-lettered chalkboard near the entrance set a relaxed tone and invited a few smiles. The chalk lines had an organic wobble that read as friendly and unpolished, and smudged edges lent a casual charm.
Dusty white marks contrasted against deep black, and occasional color chalk highlights made headings pop. People paused to read the schedule or a quick line of congratulations, and the sign offered a tactile focal point that felt like an honest, approachable greeting to arriving guests.
Steps
- Sketch the layout lightly in chalk to establish hierarchy for headings and small notes.
- Trace over sketch with a mix of chalk and chalk markers to add weight and color accents.
- Wipe small smudges with a damp cloth for controlled softness and place the board by the main entry.
Tissue paper pom-poms clustered over tables

Clusters of tissue pom-poms hovered above the tables like soft clouds. Each bloom had layered petals that created a plush, voluminous profile and they cast gentle shadows on linens below.
The slight creak when a hand brushed past one felt unexpectedly satisfying, and the bright palette contrasted with neutral tableware for a lively effect. Arranged at varying heights, the pom-poms offered a sense of discovered whimsy that kept conversations light and energetic.
They made the overhead space feel thoughtful without crowding the scene.
Steps
- Stack multiple tissue sheets, snip a short fringe along opposing edges, then gather the center into a tight knot.
- Carefully separate layers to form a round, fluffy bloom and adjust until the desired fullness appears.
- Suspend pom-poms at varied heights above tables with thin string or fishing line tied to overhead supports.
Glittered bottles for a touch of shimmer

Repurposed bottles dusted with shimmer caught candlelight and turned ordinary glass into tiny beacons. The glitter had a grainy texture that contrasted with slick glass, and the sparkle moved subtly as guests passed.
Some surfaces felt rough under fingertips while others were smoothed to a soft sheen, offering a pleasing variety. The collection of bottles in graduated heights felt casually curated, and nearby florals reflected off the glitter, creating a sense of coordinated shine that read as festive and considered at once.
Steps
- Wipe bottles clean and add a thin layer of adhesive to targeted areas for a patterned look.
- Sprinkle fine glitter over the adhesive, tapping off excess to reveal the chosen design.
- Allow to rest until fully set, then arrange bottles in groups with single stems or candles.
College colors table runner with layered fabrics

A layered fabric table runner in college colors gave tables an anchored, thoughtful foundation. The combination of tactile cotton and a hint of shimmer added interest to plates and glassware.
Running a narrow strip of contrasting material down the center added a crisp line that guided the eye, while soft edges created a lived-in feel. Close inspection revealed tiny weave patterns that complemented napkin textures.
The runner worked well across long tables and smaller rounds, keeping the palette consistent and lending a gentle continuity between place settings.
Steps
- Select two complementary fabrics, cutting them to match the table length and allowing modest overhang.
- Layer the fabrics with the bolder color on the bottom and the accent strip centered on top.
- Press seams flat and lay the runner along the table, smoothing any wrinkles for a polished look.
Memory jar where guests leave quick notes
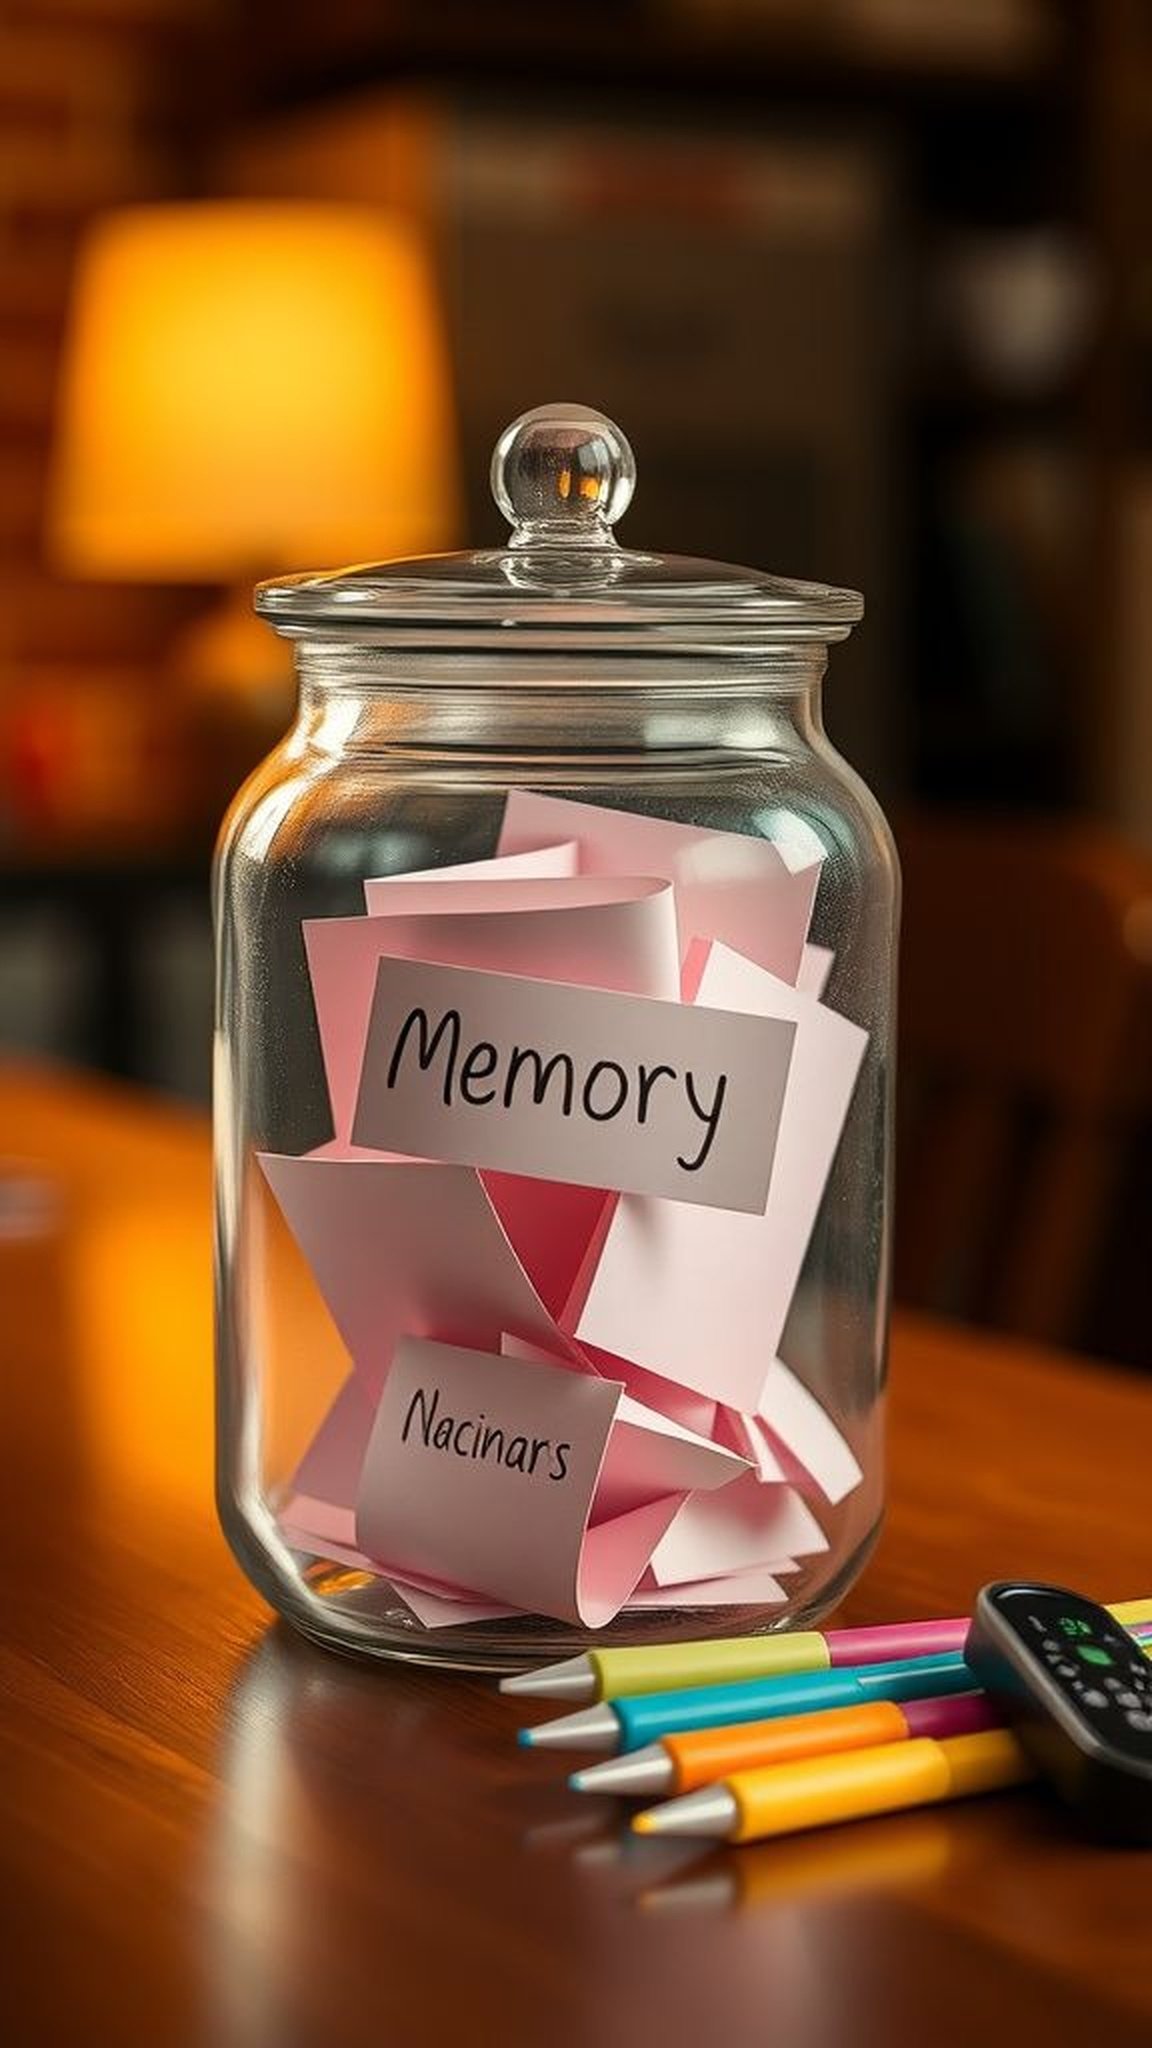
A memory jar invited small, candid messages and became a quiet focal point for thoughtful moments. The glass felt cool beneath a hand as people dropped in folded notes with tiny creases.
Pens of different inks left varied strokes across slips, and a pile of written pages collected a warm, readable weight over the evening. Guests lingered to read a line or two, sometimes smiling or turning reflective.
The jar gathered tone and voice from the gathering and felt like a communal keepsake full of tiny, textured memories.
Steps
- Place a clear jar on a small podium with a stack of paper slips and a selection of pens.
- Invite guests to write a message and fold their slip before dropping it into the jar.
- Seal the jar at the end of the event or leave it open for guests to explore throughout the night.
DIY photo booth props on a simple stick

Handheld props lined up on a table caught quick grins and exaggerated poses. The cardstock shapes had crisp edges and playful patterns, and the matte surface took marker strokes well for added detail.
Wooden sticks gave props a satisfying weight in hand, and guests found themselves riffing with different combinations. There was an easy, almost mischievous energy as people swapped moustaches and graduation caps, and the props created a short, bright burst of laughter that broke the ice between distant relatives and longtime friends.
Steps
- Trace playful shapes like caps, glasses, and banners onto heavy cardstock and snip them out.
- Decorate shapes with markers, metallic accents, or small paper details and allow any wet media to dry.
- Fasten each shape to a slim wooden stick with strong tape and display them in a jar near the photo area.
Paper fan garlands for a retro festival feel

A string of pleated paper fans along a fence gave a vintage fête feel to the yard. Each fan had precise creases that caught shadow and light, creating concentric patterns when viewed at an angle.
The paper edges created tiny, rhythmic lines and the overlapping geometry felt soothing. Colors shifted gently between fans, producing a hand-curated gradient that felt both cheerful and composed.
Visitors paused to admire the orderly folds and often commented on the nostalgic air it lent the space, like a bright memory from a summer fair.
Steps
- Score strips of paper evenly and accordion pleat them to create a fan profile.
- Secure the base of each pleated fan with a stitched staple or small clip and open into a circle.
- Thread the fans along a string at regular intervals and hang the garland along a fence or wall.
Yarn-wrapped marquee letters that spell out joy

Bulky marquee letters wrapped in yarn offered a cozy, textured twist on classic signage. The yarn added a soft, almost knitted surface that felt inviting to the touch, and the circular lights nestled against the fibres sent warm pinpoints through the strands.
From a distance the letters read bold and confident; up close the wrapped layers revealed slight irregularities that read as handcrafted charm. The tactile contrast between the smooth lights and fuzzy yarn was oddly pleasing, and the display served as a quiet, tactile centerpiece that gathered attention without shouting.
Steps
- Trace large letter shapes onto stiff board and cut the shapes out with a safe blade.
- Insert a sparse row of battery-operated bulbs into small holes across each letter surface.
- Wrap yarn tightly around the letters until the board is covered, leaving bulbs exposed, and secure the ends with tape.
Star lanterns to hang from tree branches
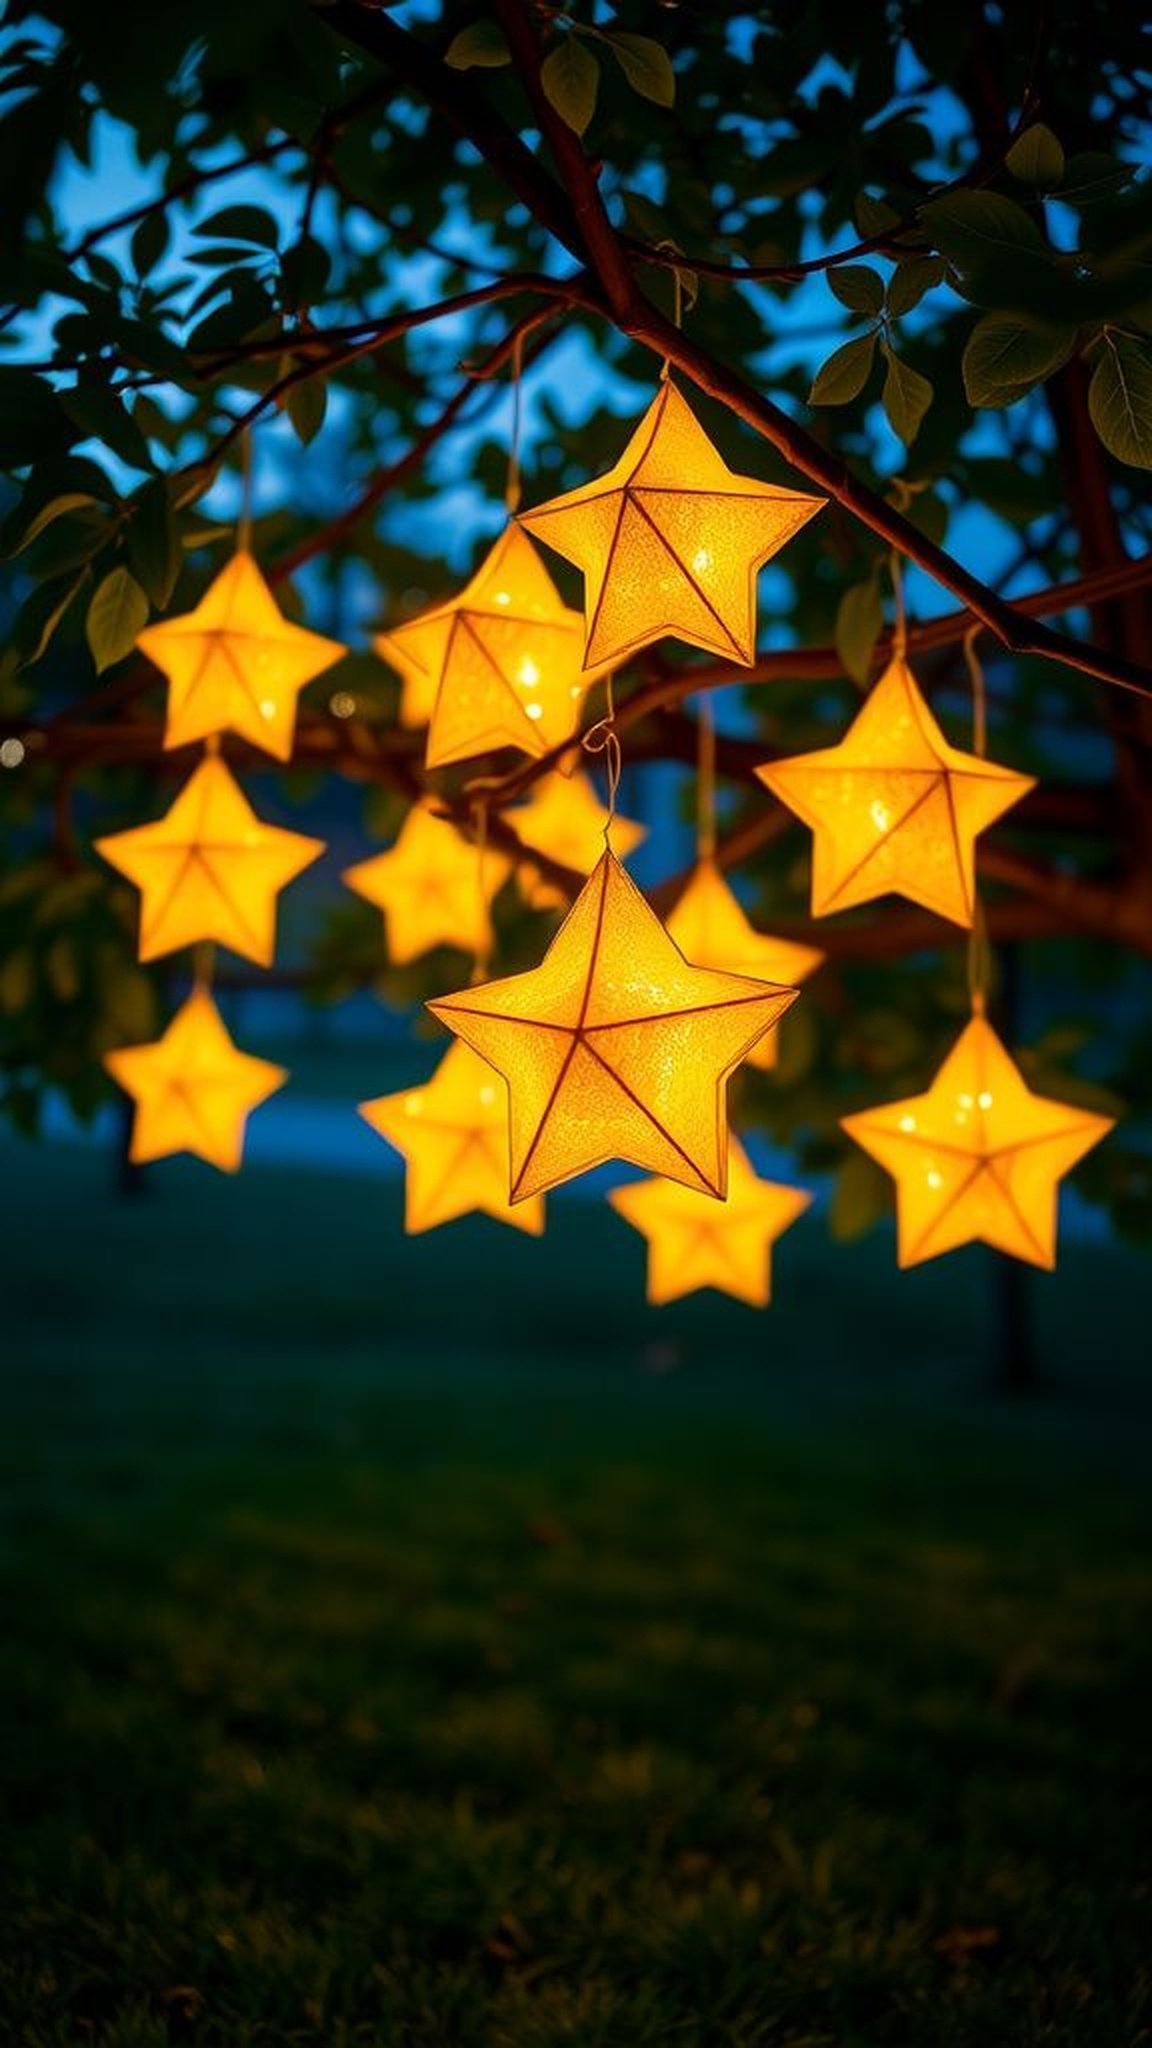
Three-dimensional star lanterns dangling from branches turned the canopy into a little constellation. The paper points cast geometric shadows on the grass and the edges caught soft light, creating a silhouette of crisp angles.
When breezes moved, the lanterns swayed gently and threw playful patterns onto nearby surfaces. A quiet hush seemed to fall as the stars rotated, and the scene read as intimate and a touch whimsical.
Their presence made the outdoor room feel enclosed and festive at the same time, like a sky brought within reach.
Steps
- Score and fold heavy paper into star templates, ensuring crisp points and even panels.
- Reinforce corner seams with narrow strips of tape for durability and leave a small opening for lights.
- Place a battery light inside each lantern and hang from branches with thin cord, adjusting heights for visual interest.
Ribbon streamers that create motion and color

Long ribbon streamers fluttered from poles and made subtle motion the entire evening. The satin ribbons whispered against each other and caught tiny highlights wherever they overlapped.
Different widths and textures added rhythm to the display, and the colors blended in gentle ombre where they met. As people moved past, the streamers trailed and left a fleeting ribboned wake that felt lively and theatrical without being fussy.
Watching guests weave through them produced a pleasant, almost cinematic moment that guests remembered when looking back at photos.
Steps
- Cut ribbon lengths in assorted widths and colors, keeping the ends neat with angled snips.
- Tie ribbons to lightweight poles or a horizontal line at varying intervals for layered movement.
- Secure poles in weighted bases and allow ribbons to hang freely so they catch air currents.
Mini tassel place cards with playful color pops

Tiny tassel place cards added a cheerful punctuation to each setting. The small fibers had a soft sweep and the colors contrasted nicely with neutral plates.
Each card sat at a jaunty angle, offering a little personal welcome as guests settled. The tassels made a faint rustle when nudged, which felt pleasantly tactile during conversations.
These little flourishes read as thoughtful without being grand, and they offered a simple keepsake guests often tucked into pockets or napkins before leaving.
Steps
- Cut narrow strips of thread or thin yarn and snip to create little tassel fringes.
- Bind the top of each bundle with a short loop of thread and trim to tidy the shape.
- Tie the tassel to folded name tags and set them at each place setting for a colorful accent.
Hanging paper fans that add texture and pattern

Individual paper fans suspended from a ceiling created a patterned canopy that read as festive and cozy. The fans’ concentric pleats produced repeating shadows and a soft acoustic dampening that made the space feel intimate.
Layers of complementary prints created a tapestry that changed as guests shifted under it. Up close, tiny creases and paper grain were visible, lending honest, handmade character.
The installation felt playful without clutter, and people kept looking up, which added an energetic lift to the gathering.
Steps
- Fold cardstock or patterned paper into uniform accordion pleats and secure centers with small staples.
- Open each pleat into a circular fan and secure edges with tape or a dab of adhesive.
- Suspend the fans from the ceiling at staggered heights with thin string to create depth.
Lighted photo clip string that displays memories

A string of tiny clamps holding photos under warm fairy lights created a moving gallery along a fence. The bulbs lifted each image into view, casting soft halos around snapshots.
The metallic clips made a faint metallic click when adjusted, and photos caught gentle flare from the adjacent lights. The arrangement invited slow browsing and quiet conversation as people traced faces and moments along the line.
The combination of light and imagery created a gentle pace to the display, encouraging guests to pause and revisit shared memories throughout the evening.
Steps
- Attach a strand of battery-operated fairy lights along the desired span and secure the battery pack out of sight.
- Clip printed photos to the lighted strand using small wooden or metallic clips, spacing images evenly.
- Add a few decorative cards or captions between photos to add variety and guide viewing flow.